Electric Curiosities: Stereoscopic 3D Gaming
As you may be aware, I am a video game collector. I’m also a bit of a 3D nerd, having custom built my own stereoscopic camera. But until now, I’ve never really combined the two. That’s gotta change.
Last year, the Nintendo 3DS was released. The handheld is far from the first time someone has tried 3D gaming. Many people remember (and most have tried to forget) the Virtual Boy, but even that wasn’t the first time stereoscopic games have been released. The following is a bit of an exploration of stereoscopic gaming over the years.
Tomytronic 3D
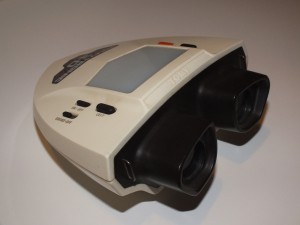
The earliest example of stereoscopic gaming that I own ((Although, not necessarily the earliest overall. Finding out what 3D game was the first would involve something called “research” which I can’t be bothered with)) is the TomyTronic 3D handheld from the early 80s. It’s a cross between a ViewMaster and one of those simple handheld LCD games. You look into the eyepiece, where you’re treated to a pair of LCD screens in front of a painted backdrop, all backlit by the frosted plastic window on the top of the unit. You hold the game like a pair of binoculars as you play, and control the game using buttons on the top of the device. Pictured here is my Thundering Turbo game, which is apparently some sort of cosmic racing game.
Unfortunately, mine is broken. I can put batteries in, but it won’t turn on. As such, I’m unable to describe the gameplay or talk about the quality of the 3D effects. All I can see is the swirling cosmic rainbow backdrop. Oh well.
Vectrex 3D Imager
Around the same time, there was a 3D attachment released for the Vectrex. In case you haven’t heard of it, the Vectrex is one of the odder systems out there, in that it comes with its own TV. That’s right, the console has the display built in, or rather, the console is built into the display. This makes the system somewhat portable, if you don’t mind lugging around a 10 inch CRT TV with you. At any rate, Vectrex released a set of 3D glasses for use with some of its games. These glasses preceded LCD shutters. Instead, they used a spinning disc inside the glasses. Half of the disc was black, and the other half was evenly divided into several colors. The effect was two-fold.
First, the black half would completely block one eye. When the black part blocked the left eye, the system would display the image for the right eye, then, as the disc rotated on, the right eye would get blocked and the left image would be shown. Since each eye would only see one image, the brain would reconstruct the pair of images from each eye into a 3D image. The same effect is employed by the active shutter glasses used by some 3DTVs today.
Second, the three colored sections would give the effect of some color to the image, instead of the pale blue lines the Vectrex display was limited to.
I also have to imagine that there was a third effect: Brain splitting headaches. Having a spinning disc strapped to your head and alternating between blackness and a trio of colors could not possibly have been good for you. I also have to wonder if a rapidly spinning disc in front of your face would have a gyroscopic effect which would make it difficult to turn your head while it was running…
I don’t have a picture of the Vectrex 3D Imager because I don’t have one, and I don’t have one because those things are crazy expensive and hard to find.
SegaScope 3D
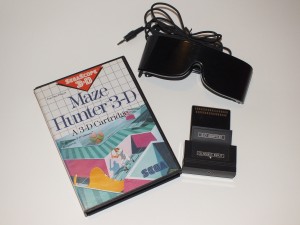
Later in the 80s, technology had advanced to the point where 3D gaming no longer meant wearing rotating colored discs in front of your face. Instead, as Sega showed with its SegaScope 3D accessory for the Sega Master System, 3D gaming meant putting on a pair of oversized sunglasses. The SegaScope used active shutter technology, where the lenses in the glasses would alternate between black and transparent. The game would alternate frames in sync with the shutters (So the games will appear to be rapidly jumping left and right to anyone not wearing the glasses). The result was full color 3D gaming with a high framerate.
And a headache.
The framerate may have been high, but it wasn’t high enough. The flicker of the shutters is noticeable, and after just a few minutes of play, you’ll start to feel it.
The glasses themselves are also fairly heavy and their weight will tend to be irritating after just a short period.
It’s a shame, though, because the 3D effect is excellent. For example, Maze Hunter, pictured here, is a top-down multi-level maze crawler. When you jump, you fly out of the screen, and as you advance, you work your way down, further and further into the screen. And it’s all done without color distortion or ghosting.
A total of eight games were released with SegaScope support. Maybe someday I’ll pop a few aspirin and spend an afternoon playing through them. ((Except for Outrun 3D, which I don’t have. Yet…)) Or, better yet, I’ll find a way to get the frame sequential 3D mode of my 3DTV to work with the SegaScope games, and I’ll be able to play without the clunky shutter glasses.
Nintendo Anaglyphic 3D
Nintendo also dove into the 3D market back in the late 80s. Who could forget pressing Select and playing Rad Racer in 3D?
Well, actually, I never owned Rad Racer back then, but I always wanted it because it was 3D and therefore awesome.
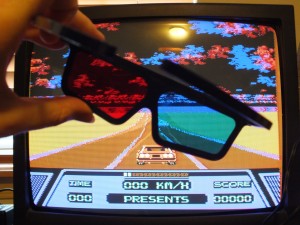
Rad Racer used anaglyphic glasses, the stereotypical color-distorting red and blue glasses that people think of when they think of “3D Glasses”. I recently played Rad Racer in 3D and the 3D effect didn’t work. I don’t know if I had the wrong color glasses, or if the NES Clone I was playing on didn’t like the 3D output, or if something else was wrong, but no matter what I tried, I kept seeing two of everything.
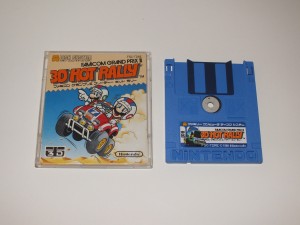
Thing is, Rad Racer wasn’t supposed to use those red/blue style glasses. Neither was 3D World Runner, another game released around the same time (And also developed by Square, of Final Fantasy fame). Those games were originally developed for the Famicom 3D System which was only released in Japan. The Famicom 3D System was similar to the SegaScope 3D, in that it used shutter glasses, although the Famicom ones look more like ridiculous futuristic VR goggles than wrap around sunglasses.
Nintendo never brought the 3D System across the water, which means you’ve never played 3D Hot Rally.
Then again, neither have I…
Pulfrich Effect
Several games used the Pulfrich effect for 3D gameplay.  The Pulfrich effect is based on some psychological visual trick that I’m not going to pretend to understand. It occurs when what one eye sees is slightly darker than what the other eye sees. Objects will appear to be closer or further away by virtue of the direction and speed in which they’re traveling. Go to the right really fast, for example, and the object will appear very close, while slowly to the left will make it appear farther away. While this would work on any TV and provide full color 3D games, using only cheap paper glasses with one slightly darkened lens (And won’t distort the image at all for viewers without glasses), there was one rather significant drawback: The Pulfrich effect requires constant motion to work.
That means that you probably won’t get a headache from Pulfrich games. You’ll just get nauseous instead.
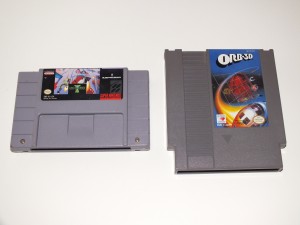
I have two games which use the Pulfrich effect. Orb 3D for the NES is a strange bubble popping variant of Pong. At least that’s what level 1 is. I don’t know if there’s more to the game or not because I found it far too tedious to keep playing. Jim Power: The Lost Dimension in 3D is a generic action platformer for the SNES which ends up doubling down on the motion sickness by having multi-layer parallax scrolling backgrounds that move in the wrong direction. Oh, and it’s really frickin’ hard.
Virtual Boy
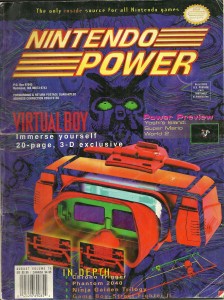
The first go-big-or-go-home, swing-for-the-fences multi-game dedicated 3D system wasn’t Nintendo’s Virtual Boy. It was, of course, a complete failure.
It wasn’t because of the 3D effect, which was excellent.
It wasn’t because of the games, most of which were pretty good.
There were two things which contributed to the downfall of the system. First was the form factor. It was too big to be portable, but it didn’t connect up to a TV, so no one was quite sure what to make of it. In order to play, you sat the device on a table and stuck your face into it, much like those eye exam machines at the DMV. This is not a comfortable way to play a video game. I’m convinced that most of the headaches people reported from playing this system were not eyestrain related, but instead were caused by holding your neck in an unnatural position for an hour while you played. The second problem is that it’s red. Very very very red. All of the games are red. For cost and clarity reasons, Nintendo used an array for red LEDs to produce the graphics, instead of a pair full color LCD panels. After all, they’d had phenomenal success with the monochrome Game Boy. But red? Red is not a good color for video games.
By the way, the controller for the system is AWESOME. I wish Nintendo had kept the basic design for its later systems.
Stereograms
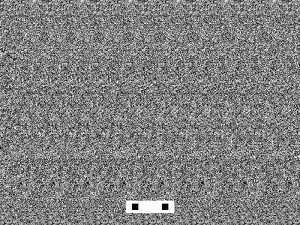
Yep, those Magic Eye stereogram SIRDS 3D things that were all the rage in the mid 90s. At least one game, Magic Carpet, had this mode built in, and I’ve seen people release OpenGL/DirectX drivers to do this to other games.
It is, of course, an entirely ridiculous idea. I’ve never played Magic Carpet, but I’ve seen Quake in stereogram form, and it was a staticy mess that was terrible to play. But hey, it’s 3D.
Now, just look through the screen until the dots merge and… Oh, sorry, took too long. Game over.
Ridiculous Futuristic VR Goggles
Some games, notably Descent, had support for VR headsets. Unfortunately, users of the VR headsets were often sucked into an alternate reality run by some megalomanical hacker that had taken over the virtual realm, so they didn’t really take off.
I don’t have a VR headset, so I don’t have pictures of any…Â Yet.
Anaglyphic, Part 2
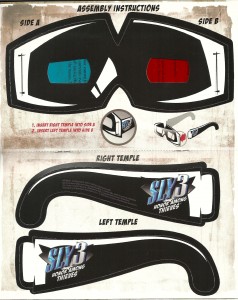
Anaglyphic has continued to be option that games use for 3D images. Sly Cooper 3, for instance, had several sections that could be played with raccoon-themed red/blue glasses. Even more recently, the Game of the Year edition of Batman: Arkham Asylum had a Purple/Green anaglyphic mode, instead of a true 3DTV compatible mode like I was expecting when I bought the game. Now I’m stuck with a copy of Arkham Asylum that I didn’t really want.
3D TV
After years and years of the technology being just on the horizon, 3D TVs are finally making their way into homes. Of course, there’s nothing to watch on them yet. There are only a handful of cable channels, and most people don’t get them. No ordinary TV series is filmed in 3D yet.  There are a limited number of 3D movies out on Blu-Ray (And Avatar isn’t one of them, yet…), but they’re mostly cheap horror movies or cartoons. So, what to do if you’ve bought one of these new-fangled 3D TV gadgets?
Buy a PS3.
No, seriously. Buy a PS3. Sony is making a big push into the world of 3D (Likely because they want to sell 3D TVs, of course…), so there are a growing number of titles for the PS3 with support for 3D TVs, including most of their AAA releases this year.
The XBox 360 is running a bit behind, but it’s not completely out of the picture. The recent rerelease of the original Halo had a stereoscopic mode, as did COD: Black Ops.
Of course, some games don’t have true 3D support and simply provide a side-by-side or checkerboard image.  This means you’ll get a half-resolution image and things like system menus and achievements will be severely mangled when they appear. Games with these problems are fortunately becoming less prevalent.
3D TVs can use a variety of different techniques to produce a 3D image. Some will use active shutter glasses, pretty much like the SegaScope 3D did. These glasses will constantly alternate which eye is blacked out, as the screen constantly alternates frames. The problem with shutter glasses, aside from the potential for flickering, is the fact that the glasses themselves become an electric component, one that requires battery power, one that can break, and one, most importantly, that tends to cost a boatload of cash. Those that don’t use shutter glasses tend to use passive polarized glasses. Polarized glasses are not electronic, so there’s no battery to die in the middle of the movie, and they can be had for cheap, so you can throw a party and have enough glasses for everyone. There’s a third class of 3D TVs that are auto-stereoscopic, which means they don’t require glasses at all. These are rare and tend to have a very limited viewing angle. They’re great, if you don’t mind sitting directly in the center of the screen, exactly 8.5 feet away…
Nintendo 3DS
The 3DS is currently the only system that supports 3D on all of its games. It doesn’t require glasses of any kind, nor does it involve sticking your face into the viewfinder, strapping a spinning disc to your head, or even crossing your eyes. You just look at the screen and it’s in 3D. ((Although, you have to look at the screen -just right- or you’ll see double, but that’s a minor issue…))  It also hasn’t given me a headache yet.
Oh yeah, and the games aren’t very very red. That’s important.
Like I mentioned above, it doesn’t use glasses, putting it in the auto-stereoscopic arena. It acheives this by using what’s called a “parallax barrier”. Basically, it’s a high tech version of one of those 3D looking baseball cards or album covers. The 3DS screen is divided into columns of pixels, and the parallax barrier will block out half of them for each eye. It’s sort of like looking through the teeth of a comb at an image printed in strips the width of the teeth. The left eye and right eye will look through the same gap between the teeth, but they’ll see different strips of the image behind. The result is that each eye will get a full frame that only it can see. The downside is that it had a very narrow angle where the effect works. If you’re just off to the side, you see under the barrier and look at the pixels for the wrong eye, which is why the image will get inverted. If you go even farther (or get really close with a wide angle camera lens, as in the picture above), the angle to the barrier becomes so steep that you’ll start to see multiple images at once. The technology is still advancing, and it’s easy to imagine that a future screen would have a display that tracks your eye position (using the front facing camera) and constantly adjusts the barrier, so that no matter where you are looking from (or if two people are watching from different angles) the image will look correct.
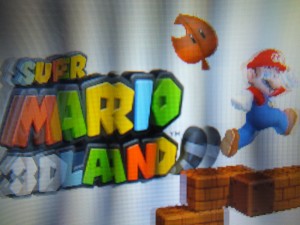
The system got off to a bit of a rocky start, due to the high price tag and lack of killer games, but now that they’ve dropped the price and released Super Mario 3D Land, it’s got more of a chance. Then again, it might have more of a chance if Nintendo marketed it more as an upgraded DS with 3D support than a 3D system with upgraded DS support…
Oh, and I didn’t even mention the anagylphic games that were being developed for the Atari 2600… Or the fact that Luigi’s Mansion for the Game Cube was built to have stereoscopic 3D support. Oh well, can’t talk about everything, can I?
Did I mention it’s got Super Mario 3D Land?  It has Super Mario 3D Land, so go get one and play Super Mario 3D Land. That game will wash the bad aftertaste of Wii waggle-infected Super Mario Galaxy from your mind.
January 16, 2012 2 Comments
Nintendo 3DS Picture Packs and Viewing 2D Images on the 3DS
In my last post, I described how to prepare your own 3D pictures for viewing on the Nintendo 3DS. Of course, most of you probably don’t have your own 3D camera, so those steps aren’t terribly useful to you. Most of you will want to put someone else’s 3D MPO files onto your 3DS.
Here’s a bunch of 3D pictures I’ve taken with my 3D camera, all packaged up and ready for your to put on your 3DS: Nintendo 3DS Picture Packs
Detailed instructions are available over there, but it’s basically open the ZIP file, copy the directory in the ZIP into the DCIM directory on an SD card, then stick the SD card in the 3DS and you’re ready to go.
Of course, if you want to put your own 2D pictures onto the 3DS, you can do pretty much the same thing. The trickiest part is naming the images the right thing. You have to put your images in a certain directory and name your images a certain way or the 3DS will get confused and refuse to show them. I’m not exactly sure what the rules are, but I’ve had fairly good luck with the DCF Standard for naming files and folders.
Files: “CCCC####.jpg“, where C is an alphanumeric character (including “_â€), and #### is a four digit number between “0001″ and “9999″. “0000″ cannot be used.
Examples:
- Valid: ABCD1234.jpg, 12341234.jpg, HNI_0001.jpg, ZLDA6502.jpg, YOSE0032.jpg, IMG_1234.jpg
- Invalid: Picture.jpg, 3D.jpg, 1234ABCD.jpg, ABCD0000.jpg
Directories: “###CCCCC“, where C is an alphanumeric character (including “_â€) and ### is a three digit number between “100″ and “999″. “000″-â€099″ cannot be used.
Examples:
- Valid: 123ABCDE, 12345678, 100NIN03, 128MARIO, 2600YOSE
- Invalid: Pictures, 3D, ABCDE123, 065ABCDE
If that naming doesn’t work, take a picture with the 3DS and mimic its file naming scheme exactly.Â
It’s also important to notice that the 3DS software isn’t designed to be a general photo viewer of your own personal pictures. It might not like your resolution, aspect ratio, bit depth, file size, camera type, subject matter, etc. There may just simply be no way to get a particular picture to display properly on the device. I tried it with a 2.7MB 10 megapixel image taken with a Canon SX10 and it did display, although it was very slow to load.
Seriously, though, you’re much better off going over here and downloading some of my 3DS Picture Packs and looking at them.
April 15, 2011 No Comments
How To Put Non-3DS 3D Pictures On Your 3DS.
So, the Nintendo 3DS has been out for a while now, and you’ve probably all been amazed by the glasses-free 3D screen ((As long as you’re DIRECTLY in front of it and the right distance away.)). If you’re like me, your first thought after holding it was “Wow, the 3D camera on this thing sucks, I wonder how I can go about getting pictures from my twinned 7.1 MP Canon A570 CHDK/StereoDataMaker rig on this screen?” Well, today, I bring you the answer.
First, you need to turn your 3D images into MPO files. MPO is the relatively new defacto standard image type for 3D cameras. It’s what the Fuji Real3D series used and what the 3DS uses. As I understand it, MPO stands for “Multiple Picture O” ((The “O” is like David O Selznick’s middle initial: It doesn’t stand for anything, it’s just there and no one really knows why.)), and the file is essentially just two JPEGs glued together. This file format was created because apparently simply using a standard side-by-side JPEG format stereo pair that could be opened and viewed and edited by any image manipulation software package made since 1996 and that stereo enthusiasts have been using for years was just too limiting. Anyway, the tool I’d recommend for converting your images to MPOs is Stereo Photo Maker. SPM is a bundle of complete awesomeness in a zip file, and if you want to do anything involving 3D photography, you want SPM. ((I’m not going to give instructions on using SPM if you haven’t already. The tool is fairly easy to figure out and there are tons of how-tos on the site and elsewhere on the IntarWebz. One point of advice: Use the Auto-Align feature, which will do an amazing job of merging your pairs.))
This tool can do a lot of things, but one thing you’ll want it to do for you is resize the MPO images to 640×480.  Yeah, that’s tiny, but that’s the native resolution of the 3DS cameras, so it’s the size that the 3DS is used to dealing with. The 3DS currently does not have any kind of zooming support, so even if you go with a higher resolution, it’s not going to do you any good at all. All it’ll do is waste a lot of space on your SD card. When you look at your pictures on the 3DS, everything will look just fine.
Anyway, once you’ve turned your traditional stereo pairs and turn them into these newfangled MPO files, you’ll quickly discover that you can’t actually see what’s in the file. That’s because Windows doesn’t understand what an MPO file is, so it refuses to render thumbnails. As always, someone on the Internet has already solved the problem for you: This guy has created some registry files which tell Windows Explorer that .MPO files are really JPGs, so Windows Explorer will happily render thumbnails for you, and you’ll no longer be blind.
Okay, so, you’ve got a ton of MPO files, now you need to get them onto the 3DS to view them. You have to put your images in a certain directory and name your images a certain way or the 3DS will get confused and refuse to show them. I’m not exactly sure what the rules are, but I’ve had fairly good luck with the DCF Standard for naming files and folders.
Files: “CCCC####.mpo“, where C is an alphanumeric character (including “_”), and #### is a four digit number between “0001” and “9999”. “0000” cannot be used.
Examples:
- Valid: ABCD1234.mpo, 12341234.mpo, HNI_0001.mpo, ZLDA6502.mpo, YOSE0032.mpo, IMG_1234.mpo
- Invalid: Picture.mpo, 3D.mpo, 1234ABCD.mpo, ABCD0000.mpo
Directories: “###CCCCC“, where C is an alphanumeric character (including “_”) and ### is a three digit number between “100” and “999”. “000”-“099” cannot be used.
Examples:
- Valid: 123ABCDE, 12345678, 100NIN03, 128MARIO, 2600YOSE
- Invalid: Pictures, 3D, ABCDE123, 065ABCDE
If that naming doesn’t work, take a picture with the 3DS and mimic its file naming scheme exactly.
By now, you’ve given your files an approved name and stuck them in a directory with an approved name. You’re almost there. Take that directory and copy it to an SD card, under the “DCIM” folder. I’d recommend using a spare SD card that you’re not afraid to wipe clean, rather than the card you typically use for the 3DS. ((I’ve had to delete the phtcache.bin file somewhere under the “Nintendo 3DS” directory a couple of times to sort things out and force the system to refresh all of the pictures.  Plus, if anything goes wrong, you don’t want it going wrong on your main card.)) I’d do this step with just a handful of images to start with, just in case it doesn’t work the first time. Your files should now be on the SD card, under a path similar this: \DCIM\2600YOSE\IMG_1234.mpo. Take that card, pop it into the 3DS, open up the Nintendo 3DS Camera app…
And wait.
And wait…
Every time I do this, the 3DS has to figure out what in the hell I’ve just done to it. I think it’s reading the directory and producing thumbnail images or something like that. I don’t really know what sort of craziness is going on behind the scenes, I just know that when you give it over a thousand files, it takes a while to get ready. First, it’ll say “Preparing…”, then it will have to “Update the Management File”, and both of those stages can take upwards of several minutes to complete. Just be patient and it’ll eventually work.Â
(Or not… Have I mentioned that everything you do with this information, you do at your own risk? I haven’t had any problems with this, nor with the testing and exploring I did prior to finding something that worked, but that doesn’t mean you won’t run into issues that I didn’t have. And if you do, those problems are between you and your local Nintendo Authorized Service Center. If Nintendo had wanted us to put our own 3D images from other sources on the 3DS, they would have, you know, made it easy to do. I make no claims as to the safety or accuracy of the method described above.)
Anyway, now you have your non-3DS images on the 3DS. The first thing you’ll notice is how much the built in camera really does suck, now that you can compare your outside images on the same screen. Your images will look sharp and clear, while the images taken by the 3DS are grainy, full of artifacts, and generally look like they were taken using a 1997 model Logitech Quick Cam. The next thing you’ll notice is how other people are actually willing to look at all those 3D pictures you go around taking, now that they don’t have to wear those stupid glasses all the time. Every single person I’ve shown it to has remarked how much nicer it is to look at my 3D pictures on the 3DS than any other way.
Of course, now I have to share my 3D pictures with you, in case you don’t have any of your own:
Yosemite: https://mathpirate.net/hold/3DS/Yosemite3DS.zip 27 pictures of Yosemite National Park, including Glacier Point, the Ahwahnee, Tioga Road, and the Sentinel Dome trail.
Central California: https://mathpirate.net/hold/3DS/CentralCalifornia3DS.zip 56 pictures, including Old Sacramento, Monterey, San Juan Bautista, Pinnacles National Monument, the Big Sur Coast, and Sequoia and Kings Canyon National Parks.
Zion National Park: https://mathpirate.net/hold/3DS/ZionNationalPark3DS.zip 19 pictures of Zion National Park.
April 9, 2011 8 Comments
Electric Curiosities: The Situation Is Under Control
In ages past, I went a little crazy and took pictures of cartridges for every cartridge-based game system I had at the time. You can find the results of that enedavor here. Since then, I’ve expanded my collection, so that post is in dire need of a sequel. That brings us to today’s post, wherein I will not be updating that previous post. In fact, I will not be talking about cartridges at all. ((Except when I talk about the Mattel Aquarius Controller.))Â
You see, despite the fact that I’ve uploaded pictures of just about every different type of video game cartridge ever made, phrases like “Fairchild Channel F Cartridge” never end up in the search queries section of my stats. You know what does? “temporal mechanics“, which is completely unrelated to video game cartridges. You know what else? “sega dreamcast controller”. So that is what I am doing today: A shameless post to boost my overall search engine ranking by reinforcing the relevancy of the site content for traffic I’m already getting. ((That, and I think I have a shot for taking the #1 spot on Google for the phrase “mattel aquarius controller”…))Â
I mean…Â
Today, I’ll be presenting pictures of joysticks, gamepads, controllers and handheld torture devices through the video game age. From Fairchild through Wii; Atari, Vectrex, Nintendo, Genesis, Playstation and even a little Virtual Boy, it’s all here.Â
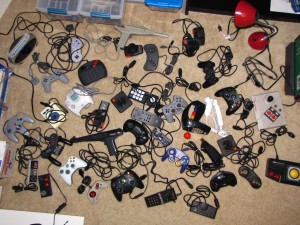
First, here’s most of the controllers all arranged carefully on the floor according to a sort criteria which I shall not divulge. How many can you name? ((Hint: The Mattel Aquarius Controller is not in that image.))Â
Okay, let’s plug this in and press start! (Or SL/SR or Run or whatever strikes your fancy.)Â
3DO
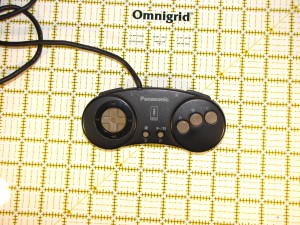
The 3DO’s gamepad is a fairly run-of-the-mill controller, featuring a Genesis-style set of 3 action buttons, yet SNES style L/R shoulder buttons. The middle buttons, typically called Start and Select, are labeled “X” and “P” here. Of particular note are the CD controls scattered around the controller, with the “Stop” square on X and “Play/Pause” triangle and bars on the P button, and fast forward, rewind, and skip icons circling the D-Pad.Â
Emerson Arcadia 2001
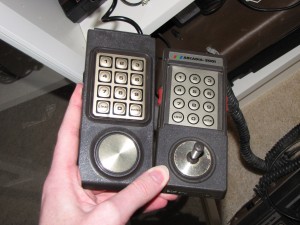
“Hey! The Intellivision is popular. Let’s rip off their controller! Then we’ll be popular.”Â
“But that’s illegal.”Â
“Don’t worry, we’ll only put one button on each side and make them red, then screw a joystick into the disc.”Â
“Now you’re talking!”Â
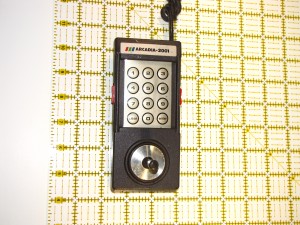
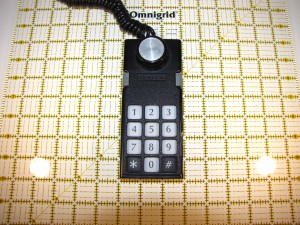
The Arcadia 2001 hand controller is a clear and blatant rip-off of the Intellivision hand controller. The number pad is pretty much identical, even as far as the font used. The size is the same, the weight is similar. They both have shiny discs as their main control surface.  They’re even both called  “Hand Controllers”, for crying out loud. Pretty much the only truly distinguishing feature is the joystick that’s screwed into the disc. That might have made a difference and been enough to forgive the similarities, provided there were any Emerson Arcadia 2001 games that you’d actually want to play, but there aren’t.Â
Atari 2600
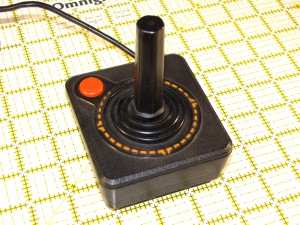
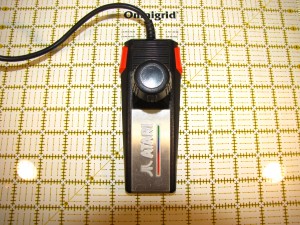
The CX-40 Joystick for the Atari 2600. Classic. Iconic. Historic. And a little uncomfortable these days. Also, as far as I can tell, this is the only controller that specifically tells you which way is the “Top”.Â
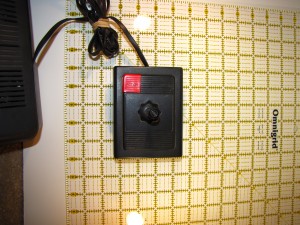
Atari 2600 Paddle
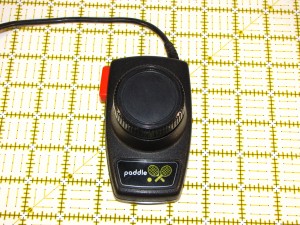
The paddle consists of a big spinning dial and a single button and provides you with some of the most precise controls you’ll ever find in a video game. You just can’t play games like Breakout or Kaboom without this level of control. Of course, that assumes that your paddle isn’t twitchy, like most are these days. Fortunately, that’s easy to fix, if you’re willing to perform some surgery and clean out all the gunk inside the potentiometer inside. For all the crazy controls game companies are trying with their systems these days, I’m surprised no one’s tried to bring back the spinner. It’s also worth noting that paddles came in pairs: Two paddles with a single connector. This allowed two sets of paddles to be connected at once, and two sets of paddles connected at once allowed the complete and total awesomeness called Warlords to exist. Unfortunately, there’s no indication which paddle is player 1 and which is player 2, so paddle games often started with a frantic attempt to figure out which paddle you were supposed to be using.Â
Atari 2600 Driving Paddle
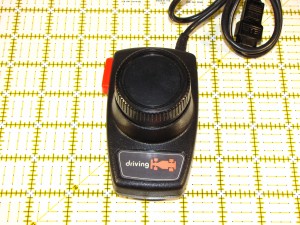
Although outwardly, the driving paddle looks identical to the regular paddle except for the sticker, internally, they are very different animals. The regular paddle has an analog potentiometer with a 270 degree range of motion. The driving paddle has an optical sensor inside, which allows it unlimited motion in either direction. The driving paddle was meant to allow free 360 degree steering, which it did… For exactly one game: Indy 500. Unlike the regular paddles, the driving paddles were not paired.Â
Atari 5200
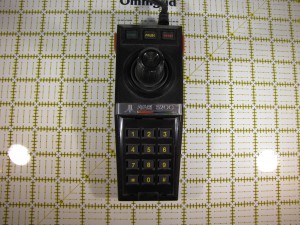
What do you get when you take the Atari joystick, make it analog, add in the Star Raiders keypad and put some mushy side buttons (two on each side) taken off the Intellivision, then mix it all together and put a shiny Atari Rainbow across the middle?Â
A big mess.Â
I will give them credit for putting the start and reset buttons on the controller and extra credit for including a “Pause” button. But it’s still a mess.Â
Atari 7800 Proline Joystick
Ow. Ow. OW. THIS CONTROLLER HURTS.Â
For the 7800, Atari clearly started with the Atari 5200 joystick, then made some changes. The keypad is gone, which is fine, because only a small handful of games used that. The Start/Pause/Reset buttons are also gone, which is a huge loss. They’ve kept the side buttons, but cut their number in half and made them large and decidedly non-mushy. The failure-prone analog stick is also gone, replaced with a standard 8-way digital stick. It’s also smaller than the 5200’s stick. The major problem with the 7800’s stick is that is rapidly becomes very painful to use. The size is small, so you have to grip it tightly, but the stick is stiff, so when you move it, it tends to move the base, as well, twisting your hand. Additionally, side buttons are misplaced on any controller, but on this one, they’re especially bad because you have to grip the base so tightly. Basically, if you enjoy severe wrist pain after about ten minutes of play, this is the controller for you! Of course, I don’t use the Pro-Line…Â
Atari 7800 Gamepad
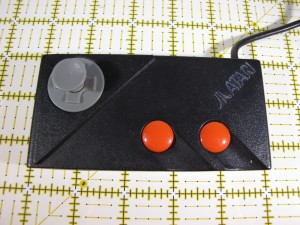
…I use this. The Atari 7800 gamepad. This beauty was apparently never released in North America, but was reportedly the default pack-in controller for the UK and Australia. It’s not the best gamepad ever (The buttons are a tad sticky, and those grooves are just pain weird), but if the alternative is the Pain-Line joystick, you’re not going to complain. If you have an Atari 7800 and don’t want to get Carpal Tunnel from playing Ninja Golf, then you need to track down one of these gamepads.Â
Atari Jaguar
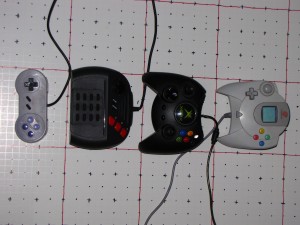
This controller is often ridiculed, but I feel that most of the criticism is unfounded. I actually sort of like this controller. I find it comfortable. The keypad with overlay support is a bit retro, but perhaps they just wanted to kick it old school. It does make games like Alien vs. Predator or Iron Soldier, where there are lots of weapon selections, very convenient to play.  The three action buttons are labeled C, B, and A, and the aux buttons in the middle are marked “Pause” and “Option”. All in all, it feels somewhat inspired by the Lynx. Strangely, the connector plug is a VGA Monitor plug. ((DE15, to be technical, unlike the 9-pin DB9 that’s used on the Atari 2600, Genesis, and Mattel Aquarius Controllers.)) The only negative thing I have to say about this controller is that when you play most of the games on the Jaguar, you’ll definitely notice the lack of an analog stick. I can’t really knock too many points off for that, though, since nothing had analog sticks at the time, it wasn’t until the N64 came out a few years later that people realized you needed analog control for 3D games.Â
It is big, I’ll give it that, but it’s actually roughly the same size as the Dreamcast controller or the original XBox monster pad. It’s also fairly light because it’s mostly empty inside, unlike the lead-lined Duke. Here’s a comparison of the three, along with a more well known SNES gamepad for reference.Â
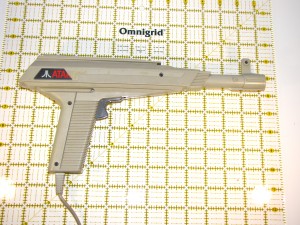
 Atari XE Lightgun
The first lightgun of this post is the Atari XE Lightgun. While I’m not really planning on getting into the Atari XEGS (There’s enough room there for a post in itself…), I felt that this gun warranted a mention, because it was the light gun intended to be used for Atari 7800 and 2600 light gun games. Yes, the Atari 2600 had a light gun game, called Sentinel. The game consists of you shooting flying things to protect a giant blue ball that bounces across the boring surface of an alien planet until either your trigger finger falls off , you fall asleep, or you get killed by the Level 3 boss which is physically impossible to defeat, because absolutely no one can shoot it enough times to kill it before it touches the ball and kills you.Â
Bally Astrocade
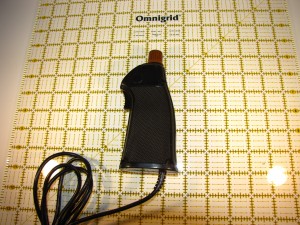
Back in the early days of video gaming, people didn’t know how to make controllers for game consoles. That’s how things like the controller for the Bally Astrocade (Or Videocade or Professional Arcade or whatever other names this system had.) came about. Bally took a pistol grip with a trigger button, then stuck a joystick nub on the top. But wait, there’s more! The nub could also rotate 270 degrees, letting it double as a paddle control, as well. This controller is very reminiscent of the Fairchild Channel F’s super-bizarro stick, which I’ll get to in a bit.Â
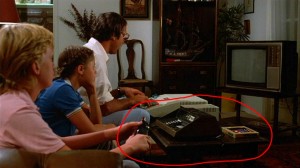
Of course, the only truly notable thing about the Bally Astrocade is its appearance in National Lampoon’s Vacation. I can’t tell if it was product placement or a joke.Â
CD-i
The Philips CD-i. Released in the early 90’s, it was an overpriced CD player that sometimes pretended to be a game console. As such, it had to have a gamepad, just like all the cool kids did. Except, for some reason, the only gamepad they looked at seems to be the two button Sega Master System controller. There’s no Start, there’s no Select, there’s no shoulder buttons, none of that complicated jive. Instead, there’s just a D-Pad and two buttons. What’s that, you say? You count three buttons? Yeah, well, so did I, until I was playing Wand of Gamelon (Yes, I own Zelda: Wand of Gamelon, and yes, I have played it. No, it’s not as bad as you’ve heard, yes, the cutscenes are terrible, but if you don’t really look at it as a “Zelda” game, it’s quite passable. The backgrounds look excellent and appear handpainted.) and couldn’t figure out why the controls for the game went out of their way to use only two buttons on a three button controller. That’s when I realized that it’s not a three button controller at all, but a two button controller with a third button that acts like you’re pressing the other two buttons simultaneously. Because, you know, you’re apparently incapable of pressing the other two buttons simultaneously and that’s something that you have to do so often that you want an entire button dedicated to that, instead of, you know, a jump button or a pause button.
CD-i Remote
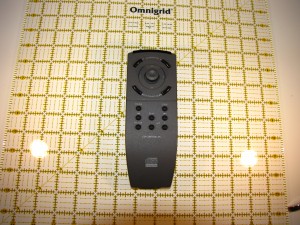
The CD-i also had a normal remote control for doing things like playing CDs or Video CDs. This controller was also good for games like The 7th Guest, which have a slower pace and were meant to be played with a mouse. If you tried using this for action games, you would fail horribly. If you notice, around the stick there are four action buttons. This does not mean that the remote gives you more buttons than the gamepad. Instead, those buttons are simply two copies of button 1 and button 2. And unlike the gamepad, there is no “Button 1+2”, so good luck with that if you ever find a game that uses that feature.
I don’t understand why it seems as though the designers of the controllers for the CD-i never talked to the designers of the system, and why neither group had ever talked to ANYONE who ever played a video game. I mean, wasn’t Nintendo involved in the creation of this system, at least on some level? Couldn’t someone there talk some sense into them? “Oh, you’re making a Zelda game? You need more than two buttons for that.”
ColecoVision
The ColecoVision came out in the age of the keypad and vertical configuration. Similar in design to the Intellivision or Atari 5200, the CV has an advantage over both of them: The buttons don’t totally suck. When you press a ColecoVision button, you know that you pressed it, unlike those mushy rubbery things that the other systems have. Like the 5200, the CV improves over the Intellivision ((And the Mattel Aquarius controller, as well.)) by putting the control stick at the top of the controller and making it grippable. The CV also accepts game-specific overlays, but unlike other systems, the overlay goes underneath a plastic grid, so you’re able to know which number you’re hitting simply by touch. I’d say this controller is the least carpal tunnel inducing of the vertical keypad set.  And best of all, the CV is compatible with Atari 2600 joysticks, so if the game you’re playing only needs one button, you can simply replace the controller with any number of more comfortable 2600 sticks or even a Genesis gamepad.
Sega Dreamcast
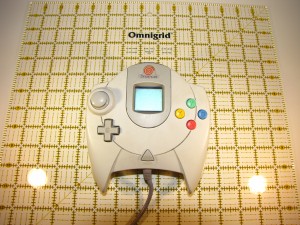
The Dreamcast controller is an obvious evolution of the Saturn 3D controller, with the same “disc with handles” shape. It only has one analog stick. It’s massive, but fairly comfortable to hold. On the top of the controller are two slots for memory cards. There is a window in the front of the controller which will show the screen of a Visual Memory Unit, if you have one. The VMU would sometimes show information about the game on a small LCD screen, but the true nature of the VMU only became apparent when you removed it from the controller. The VMU had a small D-Pad and a couple of action buttons, and would let you play very limited miniature versions of some games on-the-go, sort of like a Tamagotchi. The only thing that’s really wrong with the Dreamcast controller is the fact that it has the absolute worst wire placement since the original SMS controllers. Instead of coming out of the top of the controller and pointing at the TV and the console, the wire comes out of the bottom and points at the user. You lose about six inches of controller wire because of this, not to mention that you’re constantly getting tangled in the wire.
Fairchild Channel F
The Fairchild Channel F controller… Where to begin… All of the functions are controlled by the knob on top. It has standard 8-way movement, then it rotates clockwise and counter-clockwise, then you can push and pull the knob in and out. (And no, it doesn’t vibrate.) It’s one of the strangest primary controllers I’ve seen. Here’s a video of it in action. If you only have one hand, this is probably an awesome controller.
Gamecube
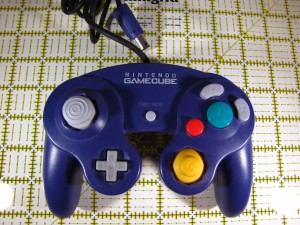
One part N64, one part Virtual Boy, one part SNES and two parts color wheel, the Gamecube’s controller is a strange one. The two analog sticks and the D-pad are fairly standard. The primary button arrangement is probably the most convoluted arrangement I’ve seen, with buttons of different shapes, sizes, and colors. There are three shoulder buttons. Not two. Not four. Three. L, R, then Z, which lives in front of R. Z is an ordinary button, while L and R are these mutant hybrid buttons, with about a half inch of travel space, then a loud click that sounds like you’re breaking the button. The button is analog until the click, then it registers as a normal button press, so some games will assign slightly different controls based on how you press the button.
Sega Genesis
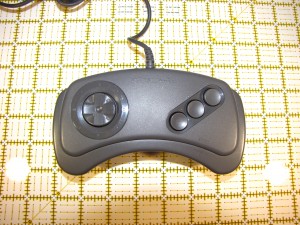
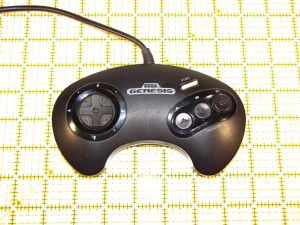
The Genesis controller has far fewer buttons than the contemporary SNES controller. There’s only three action buttons and no shoulder buttons and it’s strangely massive (7in x 4in) for having so few features, but the Genesis controller has a secret power that makes up for those shortcomings: It is compatible with the Atari 2600 and related systems. They’re cheap and easy to find, so if you can’t stand using the Atari joystick and want something a bit more comfortable for your classic games, try a Genesis controller.
Genesis 6 Button
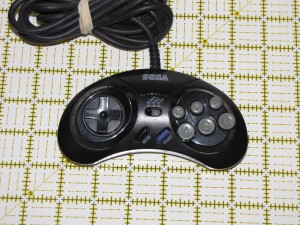
The SNES had six action buttons. That means games written for the SNES could use six buttons. The Genesis controller only had three buttons. That means that games ported from the SNES to the Genesis typically had convoluted control schemes to activate some of the actions. For instance, the Lost Vikings required combinations of the Start button and other buttons or directions to use items, change characters, even to pause. Then along came games like Street Fighter II, which required six buttons. Sega eventually came out with a six button controller for these situations. The controller is notably more compact than the monster 3-button controller. In addition to the additional “X”, “Y”, and “Z” buttons, the 6 button pad featured a turbo switch and a “Mode” button to switch between 3-button and 6-button modes, because apparently just ignoring the extra three buttons wasn’t good enough for some people. ((The Mattel Aquarius Controller is always in six button mode.))
Intellivision
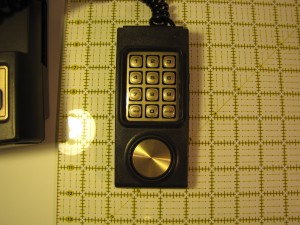
The Intellivision Hand Controller is one of the most reviled controllers in the world of video games. It’s almost as if it was designed by a group of parents who were concerned that their children spent too much time playing games, so they made a controller that would cause physical pain after roughly 30 minutes of play. There’s a sliding disc at the bottom, two buttons on each side, and a big number pad (With overlay support) in the middle. The problem is, I’ve never actually found a way to hold this controller that makes any sense. There’s nowhere to hold it so that you can use the disc comfortably. The buttons are rubbery and mushy and you never really know when you’ve pressed them, and they force you to hold the controller in an awkward way. For those who’ve never experienced what it’s like to use an Intellivision controller, imagine trying to use an oversized iPhone as a game controller, with the volume buttons as your main action buttons and the “Home” button as your control pad. And to top it off, the Intellivision controller is hardwired into the system, so you can’t get a third party controller that doesn’t suck. The Intellivision inspired a number of other controllers, including the Atari 5200 and the ColecoVision ((And the Mattel Aquarius Controller.)), but those controllers solved the problem by moving the disc to the top of the controller and replacing it with a joystick that could be gripped, making them far easier to use.
Don’t get me wrong, the Intellivision is an undisputed classic system, but if you want to play any of the games for it, you’re far better off picking up the latest Intellivision Lives! compilation and playing it on something like XBox Live Arcade or the DS. That way you won’t need wrist surgery next month.
Mattel Aquarius
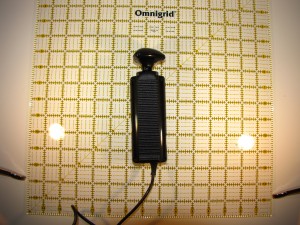
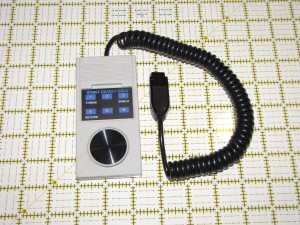
The Mattel Aquarius Controller is the direct descendant of the Intellivision’s hand controller. They took out the side buttons and cut the number pad in half and made it pluggable, but left the pain-inducing disc in the same place. That’s okay, though, because there isn’t actually anything you’d want to play on the Aquarius, so it doesn’t matter how bad the Mattel Aquarius Controller sucks.
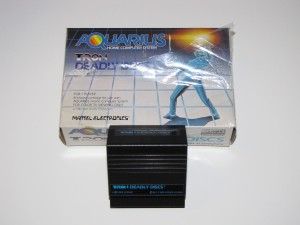
Then again, the system does have a version of Tron: Deadly Discs.
NES
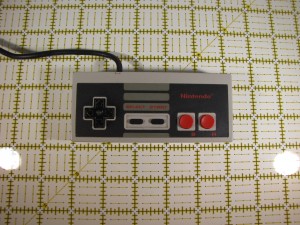
I don’t really know much about this one. There’s pretty much nothing about it on the Internet. Looks kinda square and weird.
NES Zapper
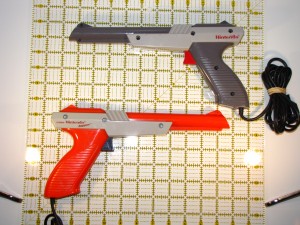
The NES Zapper came in two styles: Looks-too-much-like-a-real-gun-so-the-cops-will-shoot-you gray and atomic orange. You couldn’t shoot that damned dog in Duck Hunt with either one.
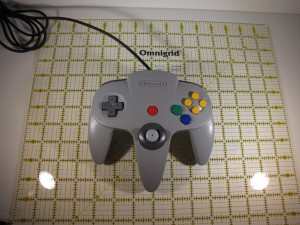
Nintendo 64
Odd looking and often ridiculed, the Nintendo 64 controller is the only controller I know of that requires three hands to use. Players were required to undergo seven hours of surgery to attach a third arm, generally taken from Chinese prison camp inmates (Although later taken from chimpanzees after several tragic incidents where the transplanted arm retained some of the violent tendencies of its original owner). Unwillingness to submit to body modification is often credited as the primary reason for Nintendo’s lack of commercial success against the Sony Playstation, although many players reported many non-game related benefits to their newly installed third arms.
Actually, I like the N64 controller. It’s comfortable, and as long as you pretty much ignore the mostly useless D-Pad and L button, there’s nothing really wrong with it.
Odyssey 2
Obviously, the Odyssey 2 joystick is heavily inspired by the Atari 2600 joystick. Although the base is roughly the same size, the stick is much smaller. It’s also spring-loaded, so it’ll snap into place when you let go of it.
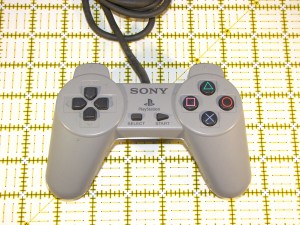
PlayStation
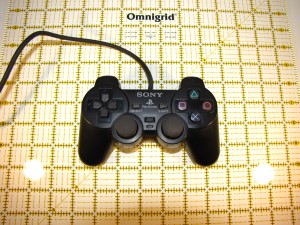
The original PlayStation controller did not have analog sticks. Instead, it had one of the worst D-pads I’ve seen, with each direction being a fake button. Instead of using letters or numbers to indicate the buttons, the PSX gamepad uses Square, Triangle, Circle, and X. It also brought back the “Select” button, which had been missing since the SNES. The PlayStation also decided that having just two shoulder buttons wasn’t enough and had a total of four shoulder buttons.
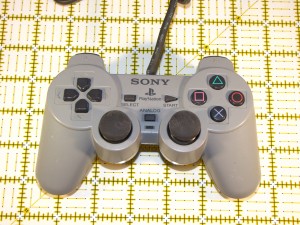
PlayStation DualShock
The DualShock slapped a pair of analog sticks on the original design. This innovation made it so shooters on consoles no longer had to suck, although initially the two sticks were only used for catching monkeys.
PlayStation 2
The PlayStation 2’s controller represented a radical shift in controller design from the earlier PlayStation controllers. Clearly, the designers took the saying “The more things change, the more they stay the same” to heart, inverted the clauses, and developed a gamepad that stayed completely the same, and therefore must, in fact, be a great change.Â
Oh, and it’s black. And supposedly has “Analog Buttons”, which you probably never really noticed in any game you ever played.
PlayStation 3
Actually, that picture is a PS2 controller, but you probably wouldn’t have even noticed if I hadn’t said anything. One could say that Sony knows when they have a good thing and don’t want to mess with it, but the truth is, the PS3 controller is almost identical to the PS2 controller because they were relentlessly mocked and ridiculed by Teh InternetZ when they released images of a boomerang that they said would be the PS3’s controller.
Sega Saturn
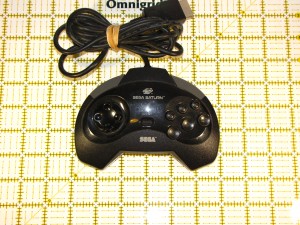
I’ve never actually played the Saturn. The controller looks like they took the 6-button Genesis controller and gave it wings and shoulder buttons. Since I’ve never used it, I can’t speak to it’s long term comfort, but it seems like it would be easy to hold and not likely to cause cramping or pain. The shoulder buttons seem to sit a bit too far forward, though.
Sega Master System
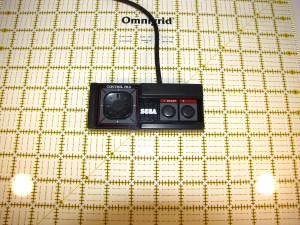
Rumor has it, Sega revealed this controller design shortly after Nintendo’s lead gamepad designer was reported missing. The SMS control pad is very similar to the NES controller, with one very glaring drawback: Start and Select are missing. When you play SMS games, you will often notice this omission. Sometimes it means you have to press Up to jump. Sometimes it means you only have one item at a time. And nearly always it means that you can’t pause without getting up and hitting a button on the console.
The control pad pictured is one of the later models. Some of the earlier versions had the wire sticking out of the side of the controller, where it would constantly jab you in the hand. It should be noted that the original wire placement was also stolen from Nintendo, who has side wires on the original Famicom, before they realized how dumb that was and put the wire on top for the NES.
SMS Light Phaser
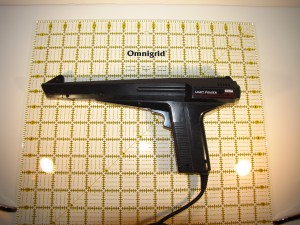
The Light Phaser for the SMS is reportedly based on some laser gun in some anime. I don’t really like anime, so I’m not going to talk about this anymore.
SNES
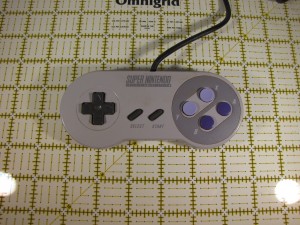
Classic. That is all.
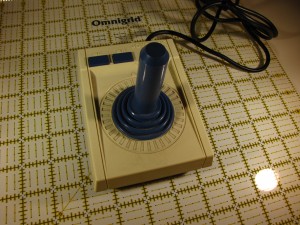
Tomy Tutor Joystick
The Tomy Tutor joystick was heavily inspired by the Atari 2600 joystick, right down to the flexible rubber base and circle of lines that don’t correspond to the directions the joystick can be pressed. Instead of the word “Top”, there’s an arrow that points forward. There’s also the word “Joystick” in raised plastic, in case you forgot what it was. The Tomy Tutor had two buttons: SL and SR.  Every game on the system referenced these buttons, presenting the cryptic phrase “Player 1, 2? SL-AMA SR-PRO” to the plaer when the game was started. It wasn’t until years later that I realized that was a difficulty selection.
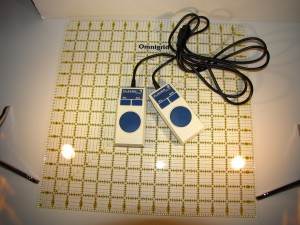
Tomy Tutor Joy Controllers
There was only one joystick port on the Tomy Tutor, making multiplayer gaming rather difficult. Tomy’s answer? The Joy Controllers. Obviously inspired by the disc on the Intellivision ((Just like the Mattel Aquarius Controller.)), the Joy Controllers came in a pair, with each one clearly labeled as “Player 1” and “Player 2” (Thus solving the “Which controller am I?” problem that the Atari 2600 paddles had.). The Joy Controllers are much easier to hold than the Intellivision hand controller. The buttons are located on the face and aren’t mushy and rubbery (The Tomy Tutor’s keyboard had enough of that…), so they’re much easier to press.
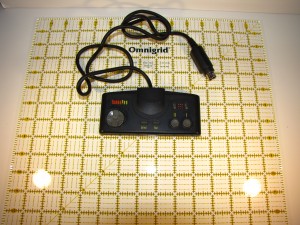
TurboGrafx 16
The TurboPad is another controller that’s inspired by the NES. At least this controller realizes the value in having a Start and Select button (Although Start is called “Run” here.). It also has built in turbo switches for the primary buttons.
Vectrex
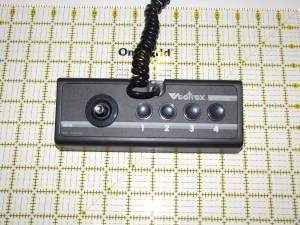
The Vectrex has the earliest horizontal controller orientation that I can think of, however, its 8 inch width precludes its use as a gamepad. Instead, it’s more like a mini-arcade set up. It is also notable for having four primary buttons and an analog controller. Its greatest weakness is the coiled telephone cord, which was inexplicably popular in the day. (See also: Intellivision and ColecoVision) ((And the Mattel Aquarius Controller, of course.))
Virtual Boy
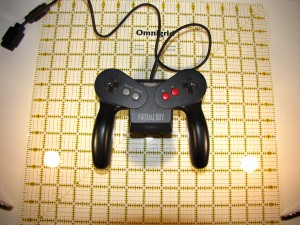
The Virtual Boy gamepad feels like a prototype N64 or Game Cube controller, minus the analog sticks. It’s the only symmetrical gamepad I can think of. It’s also the only controller I can think of with dual D-Pads. On the reverse side are L and R buttons. The power switch is also located on the controller, something not found again until the XBox 360. Unfortunately, the power source is located on the controller, as well, either in the form of a large battery pack or in a plug for a power adapter. Power issues aside, the controller is one of my favorites. It’s comfortable, it’s the right size, all of the buttons are in the right place and are easy to press. I just wish the system weren’t so painful to use.
Wii
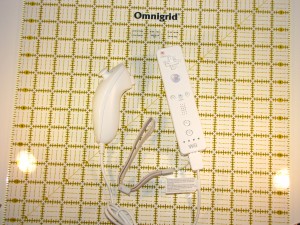
I do not like the Wii controller. The pointer can be useful for some games, and motion sensing has its place, but… As a controller for most games, this thing sucks. When playing through Super Mario Galaxy, there was hardly a level I went through where I didn’t think “I wish I was using the N64 controller for this.” And the waggle motion? Really? That has to be in every game? Of course it does, because when I think of playing video games, I think about spraining my wrist from constantly having to shake the controller side to side to perform some stupid action that should be a button press. But of course, it can’t be a simple button press because it’s impossible to press any of the buttons on this thing. I nearly dislocated my thumb while playing Metroid Prime 3. Sure, it looks nice, but video game controllers should not be created by graphic designers. They should be created by people with hands.
XBox “Duke”
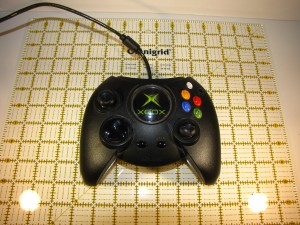
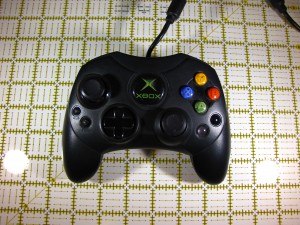
The original XBox controller was designed by people with hands, unfortunately, those hands were the size of Andre the Giant’s. This thing is big and heavy. Easily frustrated people should avoid using this controller, because it is likely to cause severe damage to anything it hits when thrown.
XBox “S”
The S controller for the XBox is a more compact controller that became the standard XBox controller shortly after the console’s release, after Microsoft realized that most of its customers were not mutants with overgrown hands. It’s still big, as far as controllers go, but it’s no longer freaking huge. The controller features the now fairly standard arrangement of two analog sticks (With clickable buttons), a D-Pad that’s rarely used, shoulder buttons, and four primary buttons arranged in a diamond shape. “Start” and “Back” are on the left side, while “White” and “Black” (Despite the fact that “White” is actually clear) are on the right side. In the top of the controller, stolen from the Dreamcast, are slots for memory cards that no one ever used for anything.
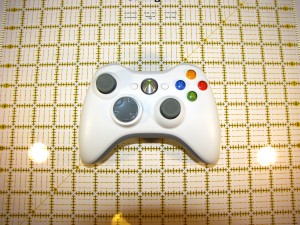
XBox 360
The 360 controller is a streamlined evolution of the XBox S controller. Gone are White and Black, having morphed into the shoulder buttons “LB” and “RB”. “Back” and “Start” have moved to the center of the controller, where they belong, the slots for memory cards are thankfully gone, and there is now a system button, which acts as a power button or brings up the system menu. I also want to point out how much I like the battery handling on the wireless controllers for the 360. When the battery gets low, the controller lights start to noticeably flash, more and more frequently. To charge, just connect the cable and keep playing. If you don’t connect in time and the battery does die, then the game will immediately freeze until you connect the charger or change the batteries, and it will remain frozen until you explicitly resume the game. Some games will even pause themselves. This stands in contrast to the Wii, where the batteries just die and so do you, because the game didn’t stop.
This, of course, was not intended to be a complete list of every controller ever made. Some controllers were intentionally left out (NES Advantage, for instance), because this was meant to be a sampling of primary/pack in controllers. Other controllers were left out because I don’t have them (Yet). Some day, I might do a follow up with some of the more interesting secondary controllers, as well as some of the more bizarre third party controllers I have in my possession. ((And the Mattel Aquarius Controller will not be part of that set.))
April 2, 2011 5 Comments
Electric Curiosities: Neo Geo AES Cartridge
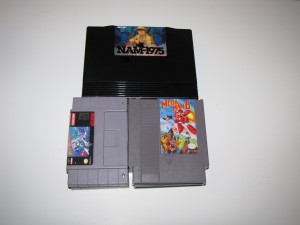
This is a Neo-Geo AES cartridge:
What this picture fails to show is the scale of this cartridge. Just looking at it, you might think that the cartridge is roughly the size of a Super Nintendo cart.
You’d be wrong.
It is, in fact, roughly the size of TWO Super Nintendo cartridge stacked together and placed next to TWO NES cartridges. Seriously. They’re that massive.
And I thought that the Fairchild Channel F carts were bulky…
June 20, 2010 No Comments
Tidbits
I seem to have been neglecting this lately. I’m a week overdue on a programming/testing post, and it’s almost getting to the point where I’m late on a video game history lesson. So, to prove I’m not dead, here’s a few bits of here and there.
First, if you’re in Washington, you have less than a week left to Approve Refererendum 71. I already have. Have you?
Now, back to games and things. Here’s a few of my latest acquisitions.
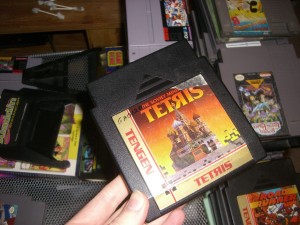
This one should require no introduction or explanation. Tengen Tetris. I spoke about this game several times in previous entries, alluding to the legal fight between Atari and Nintendo, but always in passing. Now that I actually have a copy, I’ll have to devote an entire article about it. That’ll be in the future, but for now, to illustrate its awesomeness: Two-Player Cooperative Mode.
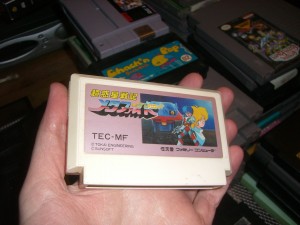
The second notable acquisition is a Japanese Famicom game called Metafight. Well, it’s actually “Something-Something Metafight”, but I don’t know Japanese. The cover has some generic anime characters, one of which looks angry. None of that really matters. I’m not really into Japanese things and I’m not really into anime or stuff like that. And I don’t have a Famicom system.  So, then, you ask, why would I go out of my way to buy a Japanese anime game for the Famicom?
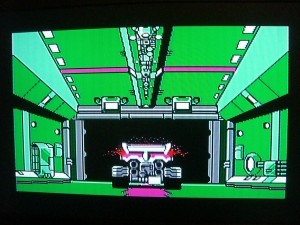
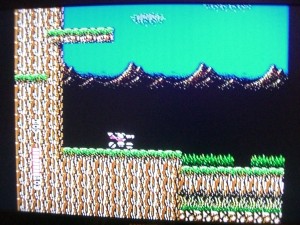
This screenshot might help you figure it out. It at least might look a bit familiar to you. Maybe. Can’t quite place it? This’ll do it:
Metafight is the Japanese version of Blaster Master. ((And if you don’t know what Blaster Master is, well, you just need to play more NES games.)) There is no opening story sequence in Metafight, which automatically means that the plot for Metafight makes far, far more sense than the “My pet frog jumped on a box of radioactive waste in my backyard and went down a hole and I followed it and found this bad-ass hyper-agile tank in the underworld and I proceeded to fight lots of nasty creatures in my bad-ass hyper-agile tank in order to rescue my radioactive mutant pet frog and save the world from the radioactive mutants that live under the Earth’s crust” plot that Blaster Master tried to have. Of course, since Blaster Master changed the story from whatever angry anime guy was doing to something stupid about a mutated frog, they had to change the tank ignition sequence to be in a cave, instead of Metafight’s futuristic tank garage.
But enough about that for today. It’s time for robots.
It’s been a while since I’ve visited the land of the video game playing robots, but I assure you, I have been thinking about them. I think the next time I get back into them, assuming I ever do, the first thing I’ll do is organize the codebase. It was built to get it to market, but not built for future expansion. If I want to keep going with this, I’ll need to rewrite large sections of it and separate the movement interface and screen capture plumbing from the game specific recognition and logic code. Although it won’t be quick, that should hopefully be reasonably straightforward to do. From there, I’d like to work on improving the control of the paddle. A few weeks ago, I think I may have improved the precision of the controls, but I still haven’t tested it out.
At any rate, I think Pong is the wrong game to try to develop precision controls. The trajectory projection gets in the way of making sure the paddle is moving exactly where I want it to go as fast as I can get it there. The paddle might very well be going where I want it, but by the time it gets there, that’s no longer where I want it. So, I think I’m going to have to try another game to tune the paddle controls. Right now, I’m leaning toward Kaboom! as the game of choice. It should have easy to program recognition and logic (Bomb drops straight down, move to catch bomb, repeat), and it will absolutely require precision, accuracy, and speed. Runner up is Indy 500, but I think the pathfinding and collision avoidance knock that one out at this point, not to mention the 360 degree driving paddle. An interesting side-note is that pretty much whatever paddle game I choose, I’ll have to deal with something I didn’t care about in Pong: The button.
Beyond the paddle, to really get things done on the Atari 2600, I’m going to need to be able to control a joystick. I have several options, of course. I can try some alternative controller, like the button operated Starplex or the gravity operated LeStick, but really, or maybe try to build my own controller, but really, to claim that I built a robot that can play an Atari 2600, I have to build something to handle a good old CX40 Atari Joystick. That’s probably not going to be easy. The controls won’t have to be as precise as the paddle, since there’s only nine options, however, it’s going to involve control on two axes that are somewhat dependent on one another. I’ve had thoughts involving double arms that push or pull, a swing arm with a piston, a gantry crane like setup, and something that rotates and can push the stick, and none of those ideas seem any good at all. I’m sure I’ll think of something.
October 27, 2009 1 Comment
Electric Curosities: Enhance your NES!
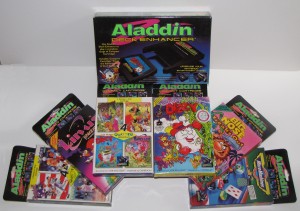
Back in the early 90’s, toward the end of the life of the NES, the company who was responsible for the Game Genie came up with another idea to make Nintendo angry. It was called the Aladdin Deck Enhancer. Reportedly designed to allow “enhanced” games on the NES by providing extra RAM and better graphics, it was called “the future of console game play” by its very own box. In reality, however, it was an ill-timed plot to sell cheap, unlicensed games for the NES.
Cartridges for the NES were fairly expensive to produce. It wasn’t just the ROM chip, a simple circuit board, and a big plastic shell, like there was in the days of the Atari. Sometimes NES games needed some extra memory, sometimes they needed a graphics coprocessor, but they always, every single one of them, needed the additional electronics to satisfy the 10NES lockout chip.
You see, Nintendo learned a lesson from the Great Crash of 83. Atari didn’t have any kind of lockout device on the Atari 2600. This allowed third party developers like Activision and Imagic to produce some of the best titles of the system without needing the permission of nor needing to pay Atari. It also allowed anyone with a ROM burner to produce mountains and mountains of unashamed garbage that masqueraded as video games. You think ET caused the Crash? No. Custer’s Revenge caused the Crash. Star Fox caused the Crash. ((Not THE Star Fox, although, interestingly enough, Star Fox for the Atari 2600 is the reason THE Star Fox had to be called “Starwing” and “Lylat Wars” in Europe. ))  Nintendo wasn’t going to let their system be killed by crappy games. The solution to this problem came in the form of the 10NES lockout.
By setting up a two-part lock electronic lock, they prevented a critical mass of lousy games from accumulating and thereby averted a full scale market implosion. ((Atari learned the same lesson. In its 7800 ProSystem console, there’s a lockout mechanism that’s so strong that it is actually against the law to export an Atari 7800 due to restrictions governing military grade cryptography. In Atari’s case, however, a second full scale market implosion was avoided, not by the lockout chip, but rather by not actually having a market that could implode.)) One part was in the console. When you put in a cartridge and turned the power on, a challenge was sent to the cartridge. If the cartridge responded properly, then you got to play the game. If the cartridge failed to respond correctly, you got a blinking power light and a flashing gray screen of death. And the only place to get the chip that acted like the key to the lock was Nintendo. They patented and copyrighted the design, so they’d sue you no matter what you tried to do to circumvent the lockout. But, Nintendo also recognized that the key to a successful console was third party support. Game publishers were welcome to make games for the NES, as long as they abided by all sorts of requirements and rules (Including censorship), and, on top of that, pay for the privilege of getting the chip for the cartridge and the “Nintendo Seal of Quality” on the box.
The program was successful. Because of it, Nintendo avoided a flood of terrible and worthless games. Sure, there were games that sucked, but for the most part, anything that had the Nintendo Seal of Quality was at least half-way decent.  Even crap-buckets like Total Recall or Super Pitfall were miles above the uninspired and derivative silicon wastelands that plagued the Atari 2600 in 1983.   The lockout chip also made piracy of NES carts more difficult. Without the 10NES key chip, a game wouldn’t play, and Nintendo wasn’t about to hand out those chips to pirates.
Of course, the flip side should be obvious. Because Nintendo controlled the chip that was the key to the system, Nintendo controlled every game that was allowed to play on it. Want to put out a game with blood in it? Nope. Want a game with strong religious themes or symbols? Ain’t gonna happen. Adult content or mature themes? Uh-uh. Want to release the same game for the NES and for Sega? Not for another couple of years. Want to put out more than a handful of games a year? Fat chance.
Don’t want to pay the licensing fee to Nintendo…?
Whenever there is a technology that will prevent someone from making money, that someone will find a way to defeat that technology, thereby allowing money to be made. That is exactly what happened with the 10NES lockout chip. Some people created pass-through carts, which looked like a Game Genie and required you to plug in a licensed NES cartridge in order to play. It then used the real 10NES chip in the licensed cartridge to unlock the NES, which then loaded the unlicensed game in the passthrough. Other companies thought that was too tacky looking and instead decided to simply fry the 10NES chip in the NES system by sending it a voltage spike. However, the truly dedicated ones reverse engineered the 10NES chip from the specifications in documents obtained under false pretenses from the US Patent Office. The corporation who was responsible for this awesome act of technological trickery? Atari. The Atari who had been nearly destroyed by unlicensed games had decided to create its own unlicensed NES games under the Tengen brand, largely to get around Nintendo’s licensing fees and severe non-compete restrictions. ((And, of course, they got sued… Although some may claim that the lawsuit was less about protecting their technology than protecting their reputation, as the lawsuit focused on the Tengen version of Tetris, generally considered superior to the Nintendo version. (Much the same way that Atari had sued Magnavox for the superior K.C. Munchkin infringing on the less-than-stellar 2600 Pac-Man…) ))
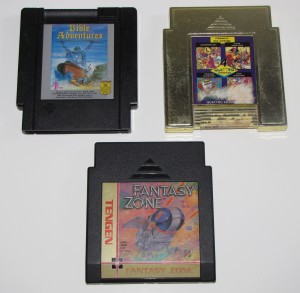
Unlicensed NES Cartridges: Bible Adventures (Wisdom Tree), Quattro Adventure (Camerica), Fantasy Zone (Tengen)
Most manufacturers of unlicensed NES games ended up following in Atari/Tengen’s shoes and created 10NES knock-off chips. However, those chips raised the cost of producing a cartridge and cut into the profit margin. Which brings us back to the Aladdin Deck Enhancer that I was talking about before I went off on that long-winded tangent of a history lesson. You see, there was nothing about the Aladdin Deck Enhancer that was really an enhancement at all.  It actually wasn’t about the extra memory, it actually wasn’t about the graphics coprocessor. It was about the knock-off 10NES chip. The plan behind the Aladdin Deck Enhancer was that they’d sell the base cartridge, which contained the lockout chip and some other chips, then sell the games that plugged into the base separately. As many games as you wanted, but only one lockout chip. The games, since they wouldn’t need to include the extra electronics, would be cheaper to produce and therefore cheaper to sell. On top of that, why not license other games for use with the Aladdin Deck Enhancer? Certainly there are other companies or game developers itching to get their games on the NES without having to deal with the Iron Fist of the Big N. It’s like a license to print money!
Or rather, in 1988, it would have been a license to print money. But the Aladdin Deck Enhancer came out in 1993, firmly in the period of 16-bit domination. If people wanted enhanced graphics and bigger games, they didn’t buy games on some convoluted half cartridge that required some bizarre mutant shell for them to work. No, they went out and bought a Super Nintendo. The company which distributed the Aladdin Deck Enhancer was ruined and folded a few months later.
The game “Dizzy The Adventurer” was included as a pack-in cartridge. The other six cartridges released were The Fantastic Adventures of Dizzy, Quattro Adventure (including Boomerang Kid, Super Robin Hood, Linus Spacehead, and Treasure Island Dizzy ((It’s obvious that Codemasters felt that Dizzy would be their killer app, with three Dizzy games available for the unit and another one promised on the box. Although apparently big in the UK, sadly, the failure of unit meant that Prince Dizzy of the Yolk Folk would remain obscure in the US…)) ), Big Nose Freaks Out, Micro Machines, Quattro Sports (including Baseball Pros, Soccer Simulator, Pro Tennis, and BMX Simulator), and Linus Spacehead’s Cosmic Crusade. ((If you’re ever in need of a Commodore 64 flashback, you should give Dizzy or the games on Quattro Adventure a spin. Not that you ever actually played those games on a C64, but they’ll certainly remind you of one.)) 11 other games were promised on the box, and while none of those were released as Deck Enhancer carts, most were later (or had already been) released as standalone unlicensed NES carts. While not crowning pinnacles of gaming glory, the Aladdin games aren’t complete abuses of the physical properties of silicon.  It’s likely that some of the games would have easily been qualified for the “Nintendo Seal of Approval”, had they wished to go legit. ((And if they hadn’t been made by the same people who made the Game Genie…))
October 3, 2009 2 Comments
Electric Curiosities: The Lost Art of Cartridge Design
These days, with the exception of the Nintendo DS, video games come on boring shiny discs that look pretty much exactly the same as every other game for every other competitor’s system. You can’t tell the difference between the games for two consoles by feel alone.
It was not always like this. Deep in the mists of time, video games all came in chunks of plastic called “Cartridges”. By look and feel, you could distinguish one system’s games from another’s. Sometimes cartridges for a system were plain and rectangular, sometimes they were embellished with features like handles, and sometimes they were yellow… Bright yellow. This post explores the cartridges for a number of different systems, some of which may be familiar to you, and some of which will hopefully strike you as freakish and bizarre.
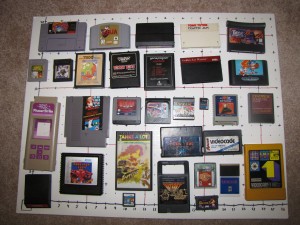
First off, the full gallery, for size comparison. For fun, I’d recommend trying to see how many of these cartridges you can identify without zooming in all the way and reading their logos.
If you don’t recognize at least three, you’re probably not going to find the rest of this post very interesting. And if you can name all of them, then feel free to start naming cartridge-based systems that aren’t represented here. There are still a few systems that I haven’t raided eBay for yet…
Anyway, without further babbling, the carts:
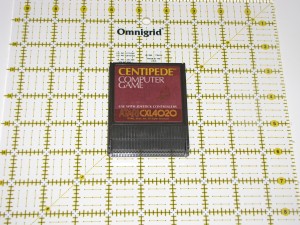
Atari 400
(Pictured: Centipede)
The Atari 400 computer had a small (by Atari standards) cartridge with a plain text brown label. The cart contacts were protected by a sliding door, which was partially exposed, unlike the doors on 2600 and 5200 carts. The Atari 800 had two cartridge slots (because one is never enough), but the slots were not equivalent, forcing Atari 400/800 games to have a marking on the top of the cart telling you to insert it into the left or the right cartridge port. However, since people didn’t buy the Atari 800, not many cartridges were made for the exclusive right port, leaving it lonely and depressed. ((It later found love in the form of the similarly ignored NES expansion port.))
Atari 2600
(Pictured: Combat)
According to what trusted sellers on eBay have told me, this is Combat for the Atari 2600, which is apparently EXTREMELY RARE (LQQK!). I had never heard of this game or this system before, so I don’t have much information on it to share.
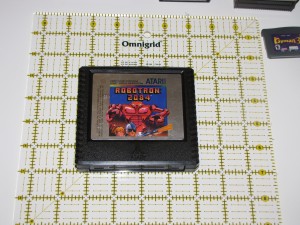
Atari 5200
(Pictured: Robotron 2084)
After their apparent disastrous failure with the Atari 2600, Atari bounced back and produced the Atari 5200, which, as the name implies, was twice as good as the 2600. 5200 carts were the largest Atari carts, with the height of a 2600 cartridge, but the width of a SNES cartridge. Typical 5200 carts were silver labels, with an image on the label and blue Atari branding. Unlike the multiple rebrands of Atari 2600 cartridges, the 5200 did not survive long enough to change this basic design.
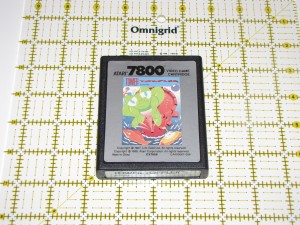
Atari 7800
(Pictured: Tower Toppler) ((Also known as Nebulus or Castelian))
During the rise of the NES, Atari released the 7800 ProSystem. Learning from some of the mistakes they made with the 5200, the 7800 had 2600 compatibility, which lead to the 7800 using a size and shape identical to the 2600 for its cartridges. 7800 carts mostly had a silver border and plain text end label, with game art in the middle of the main label.
Atari Jaguar
(Pictured: Iron Soldier)
The last gasp of the once powerful Atari, the Jaguar came out right at the transition between 2D and 3D and would have had more success had most of its games not completely sucked. (I’m looking at you, Checkered Flag. And Club Drive.) The cartridges used the extremely popular 2.75 x 4 form factor (Similar to the size used by the Genesis, SMS, Famicom, N64, TRS-80, TI-99, and Tomy Tutor), but for some inexplicable reason, had a tube shaped handle on the top.
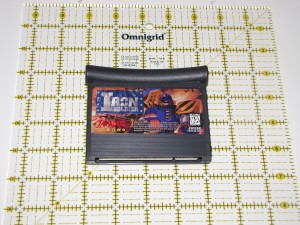
Atari Lynx
(Pictured: Scrapyard Dog)
Lynx games are some of the flattest in this set, about two credit cards thick. The contacts are exposed directly beneath the label. Most Lynx games had a curved lip at the top edge, allowing you to pull the game out of the system after it’s inserted. The Lynx is one of the few systems in this set where you can’t see what game is in the system after you’ve put the cart in, as the label faces the back of the system, instead of outward like on the Game Boy.
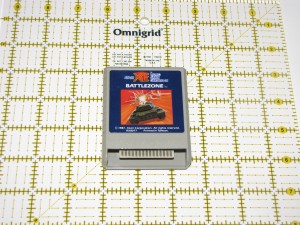
Atari XE
(Pictured: Battlezone)
The Atari XE Game System was Atari’s competitor to the Atari 7800. The two systems fought each other valiantly and both were slain in the process. The XE was compatible with Atari 400/800 series games, so XE carts were the same size and shape. The color was changed because by the late 80’s, people had realized that the early 80’s were ugly. The label was updated to include game art. And finally, the bizarre half-exposed dust door on the 400’s carts was removed for the XE.
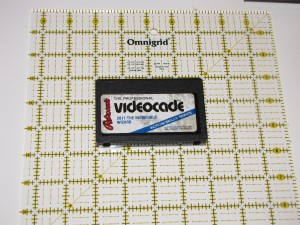
Bally Videocade
(Pictured: The Incredible Wizard)
Bally Astrocade/Videocade/Professional Arcade ((No one seems to actually know what this thing was called, not even the system itself.)) had cartridges that wanted to be cassette tapes. While they didn’t have winding spools or magnetic tape, they did have what appears to be write-protect tabs that were punched out. These holes were used to hold the cartridge in place after you inserted it, because Astrovision Videocade ((or whatever)) cartridges possessed limited intelligence and were known to try to escape when you turned the system on.
ColecoVision
(Pictured: Donkey Kong)
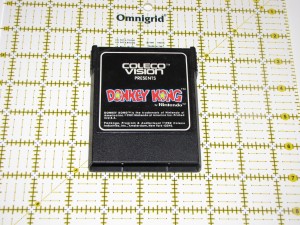
The ColecoVision knew a good thing when it saw it. Why try to come up with your own cartridge design when you can steal the one that was Atari was using?  Coleco carts are the same size and shape as Atari 2600 cartridges, but had controller overlay slots in the back and the label was reversed so that you’d see it the right way up when it was in the system. Oh, and there were little ridgey things at the top, and the case was slightly beveled to prevent you from trying to jam a Coleco cart in an Atari or an Atari cart into a ColecoVision. This cartridge camouflage is especially useful now, as less savvy eBay sellers can’t tell the difference between an Atari 2600 cartridge and a generally more valuable ColecoVision cartridge, allowing someone who can tell the difference to take advantage of them. Unfortunately, the label design for a Coleco game kinda sucks, giving the ColecoVision name more prominence than the cartridge title, and limiting the custom artwork to the title itself. ((And when they were selling the Adam computer, the corporate labeling read “ColecoVision & ADAM”, making it even larger and even more obnoxious.))
Emerson Arcadia 2001
(Pictured: Tanks A Lot)
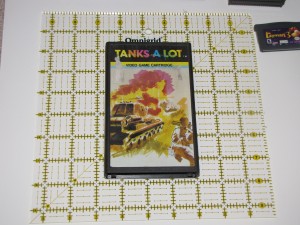
The Emerson Arcadia 2001 wasn’t satisfied with the 3×4 cartridge that the Atari and Coleco had. Oh no, they had to push it to the max. As a result, the Arcadia carts are 6 FULL INCHES of rainbow-titled watercolor AWESOME. And why stop there? Why not put a label on the BACK side of the cartridge, too?
Fairchild Channel F
(Pictured: Videocart 1: Tic-Tac-Toe/Shooting Gallery/Doodle/QuadraDoodle)
They’re yellow. They’re big. And they’ve got giant psychedelic numbers on them.
Nintendo Game Boy
(Pictured: Kirby’s Dream Land)
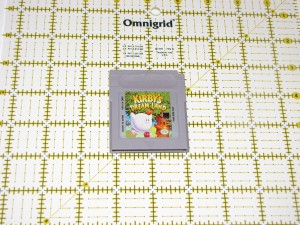
Game Boy cartridges are about the smallest a cartridge can get without feeling too small. It’s large enough that you can’t eat it and won’t permanently lose it in the seat cushions, but small enough to take large quantities with you wherever you go. It’s got a big spot for label art that isn’t invaded by branding, since the branding is built into the cart itself. These carts must have evolved from stray Bally carts, as they also have a notch for a locking device to prevent their escape. It’s also one of the few carts that tells you how to put it in the system, with a large arrow in the plastic and the words “THIS SIDE OUT” on the label.
Game Boy Advance
(Pictured: Rayman 3)
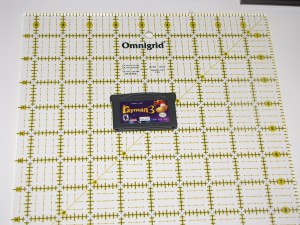
The GBA cartridge was about half the height of a Game Boy cart, leaving less room for artwork on the label. The system branding is still on the plastic and the insertion arrow is still there, but the label no longer tells you which direction faces out, leading to mass customer confusion.
Game Boy Color
(Pictured: Blaster Master Enemy Below and The Legend of Zelda Oracle of Seasons)
The Game Boy Color cheats in its quest to gain attention by having two types of cartridge that I have to comment on. There’s the Black Mutant Hybrid cartridges, which are identical to standard Game Boy carts, only black. These mutated black cartridges could be played on an ordinary Game Boy, but also contained Game Boy Colorized versions of the games. Then there’s the similarly sized clear carts, which are strictly for the Game Boy Color. The system branding region that had been indented on regular Game Boy carts was inverted into a bubble on the clear carts. Additionally, by the release of the GBC, the clear carts had been sufficiently tamed and no longer attempted to flee when they were played, so there was no need for a locking mechanism on the system, which means that they do not have a notch in one of the corners.
Intellivision
(Pictured: Snafu)
Intellivision cartridges were smaller than Atari cartridges, likely because prolonged use of the Inty’s control pad caused severe hand cramps, preventing people from opening their hands wide enough to grasp a larger cart. The cartridge has a pointed front with the game’s title on a label on the sloped surface receding from the point. There was typically no artwork on Intellivision cartridges, simply because there wasn’t enough room. In fact, there was hardly even enough real estate for the game title itself in some cases. Some Intellivision cartridges had what can best be described as a “Fill Line”, instructing you just how far to stick the cartridge into the system.  Mattel was so enamored of the Intellivision cart’s form factor that they used the same shell for their Atari 2600 versions of Intellivision titles (Known as M-Network), simply sticking on a wider base to fit the 2600’s cartridge slot. These M-Network carts even have the Fill Line.
Microvision
(Pictured: Star Trek Phaser Strike)
Milton-Bradley Microvision cartridges are large, but they’re large with a purpose. You see, they’re not just the game cartridge, they’re also a face plate, controller overlay and screen overlay, all in one. They mounted on the front of the Microvision handheld system.
NES
(Pictured: Super Mario Bros./Duck Hunt)
The Nintendo Entertainment System was another obscure system which was released in the mid-80’s. Presumably these games are so rare because they’re absolutely freaking huge. Plus, no one really wants to play games which apparently promote cruelty to animals and pyromania. Early Nintendo-produced NES games had a fairly standarized label design, with some real game graphics ((Although slightly enhanced by exciting motion lines.)) used for the artwork and the game title set beneath it at an angle, but this quickly gave way to a free-for-all anything goes approach to label design.  And they’re freaking huge. I know I might be desecrating your memory of a classic here, but seriously. Look at them. They’re FREAKING HUGE.
Nintendo 64
(Pictured: The Legend of Zelda Ocarina of Time)
This cartridge almost killed Nintendo. When the Nintendo 64 was released, it’s competitors were using CDs. PC games were almost exclusively released on CDs. Even third-rate lame ass systems like the Atari Jaguar had CD add-ons. CDs let you have amazing sound, extensive videos, full voice-overs, and games of unlimited size, plus, they were really really cheap. Nintendo, sensing a passing fad, decided to stick with the tried-and-true cartridge technology. The N64 sold 33 million systems, the PSX sold 125 million.
Nintendo DS
(Pictured:Â Rayman DS)
Too small.
Nokia N-Gage
(Pictured: Rayman 3)
Nokia thought they were going to take the world by storm and revolutionize the portable game market. Let’s put games on the phone, so people only have to carry one thing around. Let’s make the games 3D. Let’s get big licenses to make games for us. LET’S CRUSH THE GAME BOY! Sadly, in all of their big plans, no one stopped to add the requirement “Let’s make it usable”. In order to swap games in the original N-Gage, you had to pop the back cover of the phone off, then REMOVE THE BATTERY to reach the game card slot. Yeah, and it sucked as a phone, too. At any rate, I’m not sure if this one can even be legitimately included in this set, since N-Gage games came on a plain ordinary MMC card.
Odyssey2
(Pictured: KC’s Krazy Chase!)
The main section of an Odyssey 2 cartridge was roughly the same size as an Atari 2600 cartridge, but there was a large handle on the top of the cart. It’s unclear what prompted this design choice, but I suspect that O2 carts had the opposite problem from Game Boy and Astrocade carts, in that Odyssey2 carts would sometime refuse to leave the nice warm cartridge slot and you’d need to grab a hold of the handle and pull as hard as you can to get them out. Odyssey2 cartridges were black plastic, and had labels that were simplified monochrome renditions of the groovy black light art found on the boxes. The labels also featured a large Superman flying style “Odyssey2” logo emerging from the center of the artwork. Odyssey2 carts were all very exciting, as demonstrated by the use of an exclamation point in every single title for every game released on the system!
Sega Game Gear
(Pictured: Sonic the Hedgehog 2)
Like the Lynx, the Game Gear featured full color graphics and was more powerful than the Game Boy. And like the Lynx, that didn’t matter because it didn’t come with Tetris. Game Gear carts were larger than Game Boy and Lynx carts, but still small enoguh to be portable.
Sega Master System
(Pictured: Golden Axe Warrior)
SMS carts were smooth black plastic, with a small red label only large enough for the game title and Sega logo. But who cares about the cartridge, when the game in the picture is Golden Axe Warrior? If you have a Sega Master System, you need this game. If you don’t have a SMS, then you need to buy one, then buy this game. It’s that simple. Golden Axe Warrior is a pure rip-off of The Legend of Zelda, but it’s one of the most pitch-perfect ripoffs ever made. Change the main character to Link and the main enemy to Gannon, and you have the game that Zelda 2 should have been.
Sega Genesis
(Pictured: Sonic The Hedgehog 2)
Black and curvy. Obtrusive branding on label.
Super Nintendo
(Pictured: Super Metroid)
The Super Nintendo cartridge is one of the most complex cart designs around. The ridges and bevels of the NES cartridge weren’t enough for Nintendo, so they added screws, curves, divots, notches, and what appears to be aluminum siding. The label has a huge amount of space devoted to branding, but still manages to have room for game artwork. SNES carts aren’t quite as freaking huge as NES carts, but they’re still pretty big. Also, just like NES carts, they’re mostly empty space inside. Early Super Nintendo cartridges had a solid section across the base, which allowed a locking mechanism to fit into a hole on the front of the cartridge, but as time went on the carts evolved a way to free themselves from this capitivity, leading to the gapped cart shown above. In a rare gesture of defeat, later SNES consoles removed the locking arm entirely, thereby allowing even the early cartridges to escape.
TI-99/4A
(Pictured: Parsec)
Most cartridges are easy to stack in a pile. The TI-99 doesn’t play like that. Cartridges for that computer suddenly get fatter halfway up the cartridge, complicating any standard strategy. Your only hope is a backwards/forward alternation, but even that tends to be unstable.
Tomy Tutor
(Pictured: Traffic Jam)
Tomy Tutor cartridges ((All ten of them…)) are similar to Sega Master System carts with a different color scheme. They’re white instead of black, have white labels instead of red, and the label has a notebook paper motif instead of Sega’s graph paper styling. Almost makes up for the rubber keyboard.
TRS-80
(Pictured: Mega Bug)
Back in the history of ages past, Radio Shack did more than try to sell you cell phone contracts and RC cars. At one point, they had a fairly popular line of computers. No, they weren’t just computers. They were COLOR Computers. Special. TRS-80 carts had a large section of game art on the front, while the end label was a standard design with the Radio Shack logo, game title, and, for easy reordering, the catalog number.
Turbo-Grafx 16
(Pictured: Blazing Lazers)
The TG-16 used cards that were pretty much the size of two credit cards stacked together. The artwork was printed directly onto the card, rather than being an applied sticker like on pretty much every other game cartridge. Most games had a large single colored patch with the game title in the TG-16 font and the TG-16 logo. Above this is a black patch, presumably housing the actual game content. When inserted into the system, the full label section remains visible.
Virtual Boy
(Pictured: Red Alarm)
Virtual Boy carts were larger than Game Boy cartridges and featured a label with a red and blue field and the stylized game title. The lack of art on the label was mitigated by the fact that most users of the Virtual Boy lost their eyesight while playing, and were therefore unable to closely examine the cartridges.
September 26, 2009 4 Comments
Electric Curiosities: Motion Sensitive Controllers
The PS3 has one that, much like the system itself, no one cares about.
The Wii built their entire reason for existing around one.
And the XBox 360 has decided that they’re completely irrelevant, and is instead trying to pass off an EyeToy rip-off as “Innovation”.
I’m talking about motion sensitive controllers, and despite what Nintendo ((And Apple, for that matter.)) might have you believe, they’re about as innovative as Project Natal. You see, the Wii isn’t the first Nintendo system to have a motion activated joystick.Â
 The NES had one, called the “Game Handler”, from IMN Control. The Game Handler is basically the top half of a flight stick, without that whole pesky base that’s normally attached. The product code for this joystick is the overly optimistic “GH-001”, implying that not only were they expecting the line to produce a GH-002 and GH-003, but also a GH-100.
I have one. Unfortunately, my apparently gargantuan hands are unable to comfortably hold the controller in such a way that I can press all of the buttons without finger contortions. The main trigger and the primary thumb button are interchangable between A and B, while the two difficult to reach, yet remarkably in the way side buttons are start and select. They’re unlabeled, but that’s not a problem, because you’ll accidentally hit one of them rather frequently when you play, so you’ll soon learn which one is which.
Of course, Game Handler itself was not terribly innovative. The Atari 2600 even had a gravity controller, and I think it used real mercury switches, because it’s from back before mercury was dangerous. I’ve seen it called “Le Stick” or the “Heyco Gravity Joystick”. The joystick itself says “Heyco” on a small ring where the cord enters the base, but the plug appears to have been harvested off of a regular Atari joystick.  Although it’s decidedly phallic in appearance ((Thankfully it was released before controllers had a rumble feature…)), it’s much easier to hold this joystick than the Game Handler. Much of the simplicity is owed to the fact that it only has one button, and that button can be placed on the top, where it’s easy to press.Â
Thing of it is, this joystick is digital. That means it’s on/off. Which means you’re either tilted or not. There’s no clear indication of when you’re about to tilt far enough to trigger the switch. And it’s inconsistent. Sometimes left will move you left, sometimes it will move you left and up, and sometimes down. Just down. Not left and down. Just… Down. Down doesn’t move you down. Down moves you right. Of course. That means you play like you’re having a seizure.
[mediaplayer src=’/log/wp-content/uploads/2009/09/YarsRevengeGravity.wmv’ autoLoad=1 width=448 height=336 ]
I don’t normally suck that much at Yars’ Revenge.
Now, that much awesome simply cannot exist on its own. When you have an object this amazing, well, you just have to get two.
Next up:Â Robotron 2084.
So, in the end, it’s clear that the motion control of today’s consoles is not nearly as technologically innovative as you were led to believe. It had all been done before, nearly 30 years ago. The innovation made with this generation was that the designers decided that it would be a good idea to remove the suck from motion controllers and make something that actually worked.
September 16, 2009 1 Comment
The Moon Is Falling…

Well, okay, not quite 24 hours, but whatever.
September 8, 2009 No Comments

