Electric Curiosities: Stereoscopic 3D Gaming
As you may be aware, I am a video game collector. I’m also a bit of a 3D nerd, having custom built my own stereoscopic camera. But until now, I’ve never really combined the two. That’s gotta change.
Last year, the Nintendo 3DS was released. The handheld is far from the first time someone has tried 3D gaming. Many people remember (and most have tried to forget) the Virtual Boy, but even that wasn’t the first time stereoscopic games have been released. The following is a bit of an exploration of stereoscopic gaming over the years.
Tomytronic 3D
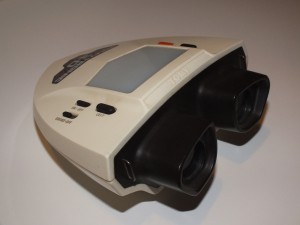
The earliest example of stereoscopic gaming that I own ((Although, not necessarily the earliest overall. Finding out what 3D game was the first would involve something called “research” which I can’t be bothered with)) is the TomyTronic 3D handheld from the early 80s. It’s a cross between a ViewMaster and one of those simple handheld LCD games. You look into the eyepiece, where you’re treated to a pair of LCD screens in front of a painted backdrop, all backlit by the frosted plastic window on the top of the unit. You hold the game like a pair of binoculars as you play, and control the game using buttons on the top of the device. Pictured here is my Thundering Turbo game, which is apparently some sort of cosmic racing game.
Unfortunately, mine is broken. I can put batteries in, but it won’t turn on. As such, I’m unable to describe the gameplay or talk about the quality of the 3D effects. All I can see is the swirling cosmic rainbow backdrop. Oh well.
Vectrex 3D Imager
Around the same time, there was a 3D attachment released for the Vectrex. In case you haven’t heard of it, the Vectrex is one of the odder systems out there, in that it comes with its own TV. That’s right, the console has the display built in, or rather, the console is built into the display. This makes the system somewhat portable, if you don’t mind lugging around a 10 inch CRT TV with you. At any rate, Vectrex released a set of 3D glasses for use with some of its games. These glasses preceded LCD shutters. Instead, they used a spinning disc inside the glasses. Half of the disc was black, and the other half was evenly divided into several colors. The effect was two-fold.
First, the black half would completely block one eye. When the black part blocked the left eye, the system would display the image for the right eye, then, as the disc rotated on, the right eye would get blocked and the left image would be shown. Since each eye would only see one image, the brain would reconstruct the pair of images from each eye into a 3D image. The same effect is employed by the active shutter glasses used by some 3DTVs today.
Second, the three colored sections would give the effect of some color to the image, instead of the pale blue lines the Vectrex display was limited to.
I also have to imagine that there was a third effect: Brain splitting headaches. Having a spinning disc strapped to your head and alternating between blackness and a trio of colors could not possibly have been good for you. I also have to wonder if a rapidly spinning disc in front of your face would have a gyroscopic effect which would make it difficult to turn your head while it was running…
I don’t have a picture of the Vectrex 3D Imager because I don’t have one, and I don’t have one because those things are crazy expensive and hard to find.
SegaScope 3D
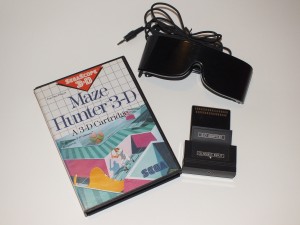
Later in the 80s, technology had advanced to the point where 3D gaming no longer meant wearing rotating colored discs in front of your face. Instead, as Sega showed with its SegaScope 3D accessory for the Sega Master System, 3D gaming meant putting on a pair of oversized sunglasses. The SegaScope used active shutter technology, where the lenses in the glasses would alternate between black and transparent. The game would alternate frames in sync with the shutters (So the games will appear to be rapidly jumping left and right to anyone not wearing the glasses). The result was full color 3D gaming with a high framerate.
And a headache.
The framerate may have been high, but it wasn’t high enough. The flicker of the shutters is noticeable, and after just a few minutes of play, you’ll start to feel it.
The glasses themselves are also fairly heavy and their weight will tend to be irritating after just a short period.
It’s a shame, though, because the 3D effect is excellent. For example, Maze Hunter, pictured here, is a top-down multi-level maze crawler. When you jump, you fly out of the screen, and as you advance, you work your way down, further and further into the screen. And it’s all done without color distortion or ghosting.
A total of eight games were released with SegaScope support. Maybe someday I’ll pop a few aspirin and spend an afternoon playing through them. ((Except for Outrun 3D, which I don’t have. Yet…)) Or, better yet, I’ll find a way to get the frame sequential 3D mode of my 3DTV to work with the SegaScope games, and I’ll be able to play without the clunky shutter glasses.
Nintendo Anaglyphic 3D
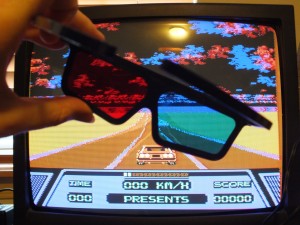
Nintendo also dove into the 3D market back in the late 80s. Who could forget pressing Select and playing Rad Racer in 3D?
Well, actually, I never owned Rad Racer back then, but I always wanted it because it was 3D and therefore awesome.
Rad Racer used anaglyphic glasses, the stereotypical color-distorting red and blue glasses that people think of when they think of “3D Glasses”. I recently played Rad Racer in 3D and the 3D effect didn’t work. I don’t know if I had the wrong color glasses, or if the NES Clone I was playing on didn’t like the 3D output, or if something else was wrong, but no matter what I tried, I kept seeing two of everything.
Thing is, Rad Racer wasn’t supposed to use those red/blue style glasses. Neither was 3D World Runner, another game released around the same time (And also developed by Square, of Final Fantasy fame). Those games were originally developed for the Famicom 3D System which was only released in Japan. The Famicom 3D System was similar to the SegaScope 3D, in that it used shutter glasses, although the Famicom ones look more like ridiculous futuristic VR goggles than wrap around sunglasses.
Nintendo never brought the 3D System across the water, which means you’ve never played 3D Hot Rally.
Then again, neither have I…
Pulfrich Effect
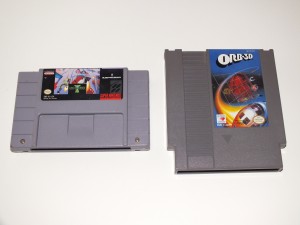
Several games used the Pulfrich effect for 3D gameplay.  The Pulfrich effect is based on some psychological visual trick that I’m not going to pretend to understand. It occurs when what one eye sees is slightly darker than what the other eye sees. Objects will appear to be closer or further away by virtue of the direction and speed in which they’re traveling. Go to the right really fast, for example, and the object will appear very close, while slowly to the left will make it appear farther away. While this would work on any TV and provide full color 3D games, using only cheap paper glasses with one slightly darkened lens (And won’t distort the image at all for viewers without glasses), there was one rather significant drawback: The Pulfrich effect requires constant motion to work.
That means that you probably won’t get a headache from Pulfrich games. You’ll just get nauseous instead.
I have two games which use the Pulfrich effect. Orb 3D for the NES is a strange bubble popping variant of Pong. At least that’s what level 1 is. I don’t know if there’s more to the game or not because I found it far too tedious to keep playing. Jim Power: The Lost Dimension in 3D is a generic action platformer for the SNES which ends up doubling down on the motion sickness by having multi-layer parallax scrolling backgrounds that move in the wrong direction. Oh, and it’s really frickin’ hard.
Virtual Boy
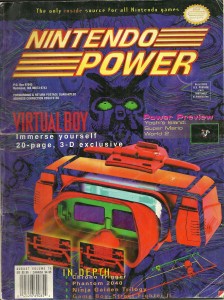
The first go-big-or-go-home, swing-for-the-fences multi-game dedicated 3D system wasn’t Nintendo’s Virtual Boy. It was, of course, a complete failure.
It wasn’t because of the 3D effect, which was excellent.
It wasn’t because of the games, most of which were pretty good.
There were two things which contributed to the downfall of the system. First was the form factor. It was too big to be portable, but it didn’t connect up to a TV, so no one was quite sure what to make of it. In order to play, you sat the device on a table and stuck your face into it, much like those eye exam machines at the DMV. This is not a comfortable way to play a video game. I’m convinced that most of the headaches people reported from playing this system were not eyestrain related, but instead were caused by holding your neck in an unnatural position for an hour while you played. The second problem is that it’s red. Very very very red. All of the games are red. For cost and clarity reasons, Nintendo used an array for red LEDs to produce the graphics, instead of a pair full color LCD panels. After all, they’d had phenomenal success with the monochrome Game Boy. But red? Red is not a good color for video games.
By the way, the controller for the system is AWESOME. I wish Nintendo had kept the basic design for its later systems.
Stereograms
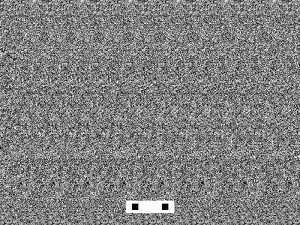
Yep, those Magic Eye stereogram SIRDS 3D things that were all the rage in the mid 90s. At least one game, Magic Carpet, had this mode built in, and I’ve seen people release OpenGL/DirectX drivers to do this to other games.
It is, of course, an entirely ridiculous idea. I’ve never played Magic Carpet, but I’ve seen Quake in stereogram form, and it was a staticy mess that was terrible to play. But hey, it’s 3D.
Now, just look through the screen until the dots merge and… Oh, sorry, took too long. Game over.
Ridiculous Futuristic VR Goggles
Some games, notably Descent, had support for VR headsets. Unfortunately, users of the VR headsets were often sucked into an alternate reality run by some megalomanical hacker that had taken over the virtual realm, so they didn’t really take off.
I don’t have a VR headset, so I don’t have pictures of any…Â Yet.
Anaglyphic, Part 2
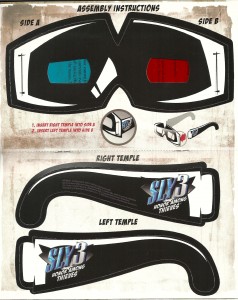
Anaglyphic has continued to be option that games use for 3D images. Sly Cooper 3, for instance, had several sections that could be played with raccoon-themed red/blue glasses. Even more recently, the Game of the Year edition of Batman: Arkham Asylum had a Purple/Green anaglyphic mode, instead of a true 3DTV compatible mode like I was expecting when I bought the game. Now I’m stuck with a copy of Arkham Asylum that I didn’t really want.
3D TV
After years and years of the technology being just on the horizon, 3D TVs are finally making their way into homes. Of course, there’s nothing to watch on them yet. There are only a handful of cable channels, and most people don’t get them. No ordinary TV series is filmed in 3D yet.  There are a limited number of 3D movies out on Blu-Ray (And Avatar isn’t one of them, yet…), but they’re mostly cheap horror movies or cartoons. So, what to do if you’ve bought one of these new-fangled 3D TV gadgets?
Buy a PS3.
No, seriously. Buy a PS3. Sony is making a big push into the world of 3D (Likely because they want to sell 3D TVs, of course…), so there are a growing number of titles for the PS3 with support for 3D TVs, including most of their AAA releases this year.
The XBox 360 is running a bit behind, but it’s not completely out of the picture. The recent rerelease of the original Halo had a stereoscopic mode, as did COD: Black Ops.
Of course, some games don’t have true 3D support and simply provide a side-by-side or checkerboard image.  This means you’ll get a half-resolution image and things like system menus and achievements will be severely mangled when they appear. Games with these problems are fortunately becoming less prevalent.
3D TVs can use a variety of different techniques to produce a 3D image. Some will use active shutter glasses, pretty much like the SegaScope 3D did. These glasses will constantly alternate which eye is blacked out, as the screen constantly alternates frames. The problem with shutter glasses, aside from the potential for flickering, is the fact that the glasses themselves become an electric component, one that requires battery power, one that can break, and one, most importantly, that tends to cost a boatload of cash. Those that don’t use shutter glasses tend to use passive polarized glasses. Polarized glasses are not electronic, so there’s no battery to die in the middle of the movie, and they can be had for cheap, so you can throw a party and have enough glasses for everyone. There’s a third class of 3D TVs that are auto-stereoscopic, which means they don’t require glasses at all. These are rare and tend to have a very limited viewing angle. They’re great, if you don’t mind sitting directly in the center of the screen, exactly 8.5 feet away…
Nintendo 3DS
The 3DS is currently the only system that supports 3D on all of its games. It doesn’t require glasses of any kind, nor does it involve sticking your face into the viewfinder, strapping a spinning disc to your head, or even crossing your eyes. You just look at the screen and it’s in 3D. ((Although, you have to look at the screen -just right- or you’ll see double, but that’s a minor issue…))  It also hasn’t given me a headache yet.
Oh yeah, and the games aren’t very very red. That’s important.
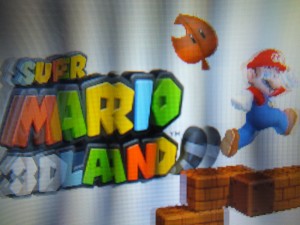
Like I mentioned above, it doesn’t use glasses, putting it in the auto-stereoscopic arena. It acheives this by using what’s called a “parallax barrier”. Basically, it’s a high tech version of one of those 3D looking baseball cards or album covers. The 3DS screen is divided into columns of pixels, and the parallax barrier will block out half of them for each eye. It’s sort of like looking through the teeth of a comb at an image printed in strips the width of the teeth. The left eye and right eye will look through the same gap between the teeth, but they’ll see different strips of the image behind. The result is that each eye will get a full frame that only it can see. The downside is that it had a very narrow angle where the effect works. If you’re just off to the side, you see under the barrier and look at the pixels for the wrong eye, which is why the image will get inverted. If you go even farther (or get really close with a wide angle camera lens, as in the picture above), the angle to the barrier becomes so steep that you’ll start to see multiple images at once. The technology is still advancing, and it’s easy to imagine that a future screen would have a display that tracks your eye position (using the front facing camera) and constantly adjusts the barrier, so that no matter where you are looking from (or if two people are watching from different angles) the image will look correct.
The system got off to a bit of a rocky start, due to the high price tag and lack of killer games, but now that they’ve dropped the price and released Super Mario 3D Land, it’s got more of a chance. Then again, it might have more of a chance if Nintendo marketed it more as an upgraded DS with 3D support than a 3D system with upgraded DS support…
Oh, and I didn’t even mention the anagylphic games that were being developed for the Atari 2600… Or the fact that Luigi’s Mansion for the Game Cube was built to have stereoscopic 3D support. Oh well, can’t talk about everything, can I?
Did I mention it’s got Super Mario 3D Land?  It has Super Mario 3D Land, so go get one and play Super Mario 3D Land. That game will wash the bad aftertaste of Wii waggle-infected Super Mario Galaxy from your mind.
January 16, 2012 2 Comments
Nintendo 3DS Picture Packs and Viewing 2D Images on the 3DS
In my last post, I described how to prepare your own 3D pictures for viewing on the Nintendo 3DS. Of course, most of you probably don’t have your own 3D camera, so those steps aren’t terribly useful to you. Most of you will want to put someone else’s 3D MPO files onto your 3DS.
Here’s a bunch of 3D pictures I’ve taken with my 3D camera, all packaged up and ready for your to put on your 3DS: Nintendo 3DS Picture Packs
Detailed instructions are available over there, but it’s basically open the ZIP file, copy the directory in the ZIP into the DCIM directory on an SD card, then stick the SD card in the 3DS and you’re ready to go.
Of course, if you want to put your own 2D pictures onto the 3DS, you can do pretty much the same thing. The trickiest part is naming the images the right thing. You have to put your images in a certain directory and name your images a certain way or the 3DS will get confused and refuse to show them. I’m not exactly sure what the rules are, but I’ve had fairly good luck with the DCF Standard for naming files and folders.
Files: “CCCC####.jpg“, where C is an alphanumeric character (including “_â€), and #### is a four digit number between “0001″ and “9999″. “0000″ cannot be used.
Examples:
- Valid: ABCD1234.jpg, 12341234.jpg, HNI_0001.jpg, ZLDA6502.jpg, YOSE0032.jpg, IMG_1234.jpg
- Invalid: Picture.jpg, 3D.jpg, 1234ABCD.jpg, ABCD0000.jpg
Directories: “###CCCCC“, where C is an alphanumeric character (including “_â€) and ### is a three digit number between “100″ and “999″. “000″-â€099″ cannot be used.
Examples:
- Valid: 123ABCDE, 12345678, 100NIN03, 128MARIO, 2600YOSE
- Invalid: Pictures, 3D, ABCDE123, 065ABCDE
If that naming doesn’t work, take a picture with the 3DS and mimic its file naming scheme exactly.Â
It’s also important to notice that the 3DS software isn’t designed to be a general photo viewer of your own personal pictures. It might not like your resolution, aspect ratio, bit depth, file size, camera type, subject matter, etc. There may just simply be no way to get a particular picture to display properly on the device. I tried it with a 2.7MB 10 megapixel image taken with a Canon SX10 and it did display, although it was very slow to load.
Seriously, though, you’re much better off going over here and downloading some of my 3DS Picture Packs and looking at them.
April 15, 2011 No Comments
How To Put Non-3DS 3D Pictures On Your 3DS.
So, the Nintendo 3DS has been out for a while now, and you’ve probably all been amazed by the glasses-free 3D screen ((As long as you’re DIRECTLY in front of it and the right distance away.)). If you’re like me, your first thought after holding it was “Wow, the 3D camera on this thing sucks, I wonder how I can go about getting pictures from my twinned 7.1 MP Canon A570 CHDK/StereoDataMaker rig on this screen?” Well, today, I bring you the answer.
First, you need to turn your 3D images into MPO files. MPO is the relatively new defacto standard image type for 3D cameras. It’s what the Fuji Real3D series used and what the 3DS uses. As I understand it, MPO stands for “Multiple Picture O” ((The “O” is like David O Selznick’s middle initial: It doesn’t stand for anything, it’s just there and no one really knows why.)), and the file is essentially just two JPEGs glued together. This file format was created because apparently simply using a standard side-by-side JPEG format stereo pair that could be opened and viewed and edited by any image manipulation software package made since 1996 and that stereo enthusiasts have been using for years was just too limiting. Anyway, the tool I’d recommend for converting your images to MPOs is Stereo Photo Maker. SPM is a bundle of complete awesomeness in a zip file, and if you want to do anything involving 3D photography, you want SPM. ((I’m not going to give instructions on using SPM if you haven’t already. The tool is fairly easy to figure out and there are tons of how-tos on the site and elsewhere on the IntarWebz. One point of advice: Use the Auto-Align feature, which will do an amazing job of merging your pairs.))
This tool can do a lot of things, but one thing you’ll want it to do for you is resize the MPO images to 640×480.  Yeah, that’s tiny, but that’s the native resolution of the 3DS cameras, so it’s the size that the 3DS is used to dealing with. The 3DS currently does not have any kind of zooming support, so even if you go with a higher resolution, it’s not going to do you any good at all. All it’ll do is waste a lot of space on your SD card. When you look at your pictures on the 3DS, everything will look just fine.
Anyway, once you’ve turned your traditional stereo pairs and turn them into these newfangled MPO files, you’ll quickly discover that you can’t actually see what’s in the file. That’s because Windows doesn’t understand what an MPO file is, so it refuses to render thumbnails. As always, someone on the Internet has already solved the problem for you: This guy has created some registry files which tell Windows Explorer that .MPO files are really JPGs, so Windows Explorer will happily render thumbnails for you, and you’ll no longer be blind.
Okay, so, you’ve got a ton of MPO files, now you need to get them onto the 3DS to view them. You have to put your images in a certain directory and name your images a certain way or the 3DS will get confused and refuse to show them. I’m not exactly sure what the rules are, but I’ve had fairly good luck with the DCF Standard for naming files and folders.
Files: “CCCC####.mpo“, where C is an alphanumeric character (including “_”), and #### is a four digit number between “0001” and “9999”. “0000” cannot be used.
Examples:
- Valid: ABCD1234.mpo, 12341234.mpo, HNI_0001.mpo, ZLDA6502.mpo, YOSE0032.mpo, IMG_1234.mpo
- Invalid: Picture.mpo, 3D.mpo, 1234ABCD.mpo, ABCD0000.mpo
Directories: “###CCCCC“, where C is an alphanumeric character (including “_”) and ### is a three digit number between “100” and “999”. “000”-“099” cannot be used.
Examples:
- Valid: 123ABCDE, 12345678, 100NIN03, 128MARIO, 2600YOSE
- Invalid: Pictures, 3D, ABCDE123, 065ABCDE
If that naming doesn’t work, take a picture with the 3DS and mimic its file naming scheme exactly.
By now, you’ve given your files an approved name and stuck them in a directory with an approved name. You’re almost there. Take that directory and copy it to an SD card, under the “DCIM” folder. I’d recommend using a spare SD card that you’re not afraid to wipe clean, rather than the card you typically use for the 3DS. ((I’ve had to delete the phtcache.bin file somewhere under the “Nintendo 3DS” directory a couple of times to sort things out and force the system to refresh all of the pictures.  Plus, if anything goes wrong, you don’t want it going wrong on your main card.)) I’d do this step with just a handful of images to start with, just in case it doesn’t work the first time. Your files should now be on the SD card, under a path similar this: \DCIM\2600YOSE\IMG_1234.mpo. Take that card, pop it into the 3DS, open up the Nintendo 3DS Camera app…
And wait.
And wait…
Every time I do this, the 3DS has to figure out what in the hell I’ve just done to it. I think it’s reading the directory and producing thumbnail images or something like that. I don’t really know what sort of craziness is going on behind the scenes, I just know that when you give it over a thousand files, it takes a while to get ready. First, it’ll say “Preparing…”, then it will have to “Update the Management File”, and both of those stages can take upwards of several minutes to complete. Just be patient and it’ll eventually work.Â
(Or not… Have I mentioned that everything you do with this information, you do at your own risk? I haven’t had any problems with this, nor with the testing and exploring I did prior to finding something that worked, but that doesn’t mean you won’t run into issues that I didn’t have. And if you do, those problems are between you and your local Nintendo Authorized Service Center. If Nintendo had wanted us to put our own 3D images from other sources on the 3DS, they would have, you know, made it easy to do. I make no claims as to the safety or accuracy of the method described above.)
Anyway, now you have your non-3DS images on the 3DS. The first thing you’ll notice is how much the built in camera really does suck, now that you can compare your outside images on the same screen. Your images will look sharp and clear, while the images taken by the 3DS are grainy, full of artifacts, and generally look like they were taken using a 1997 model Logitech Quick Cam. The next thing you’ll notice is how other people are actually willing to look at all those 3D pictures you go around taking, now that they don’t have to wear those stupid glasses all the time. Every single person I’ve shown it to has remarked how much nicer it is to look at my 3D pictures on the 3DS than any other way.
Of course, now I have to share my 3D pictures with you, in case you don’t have any of your own:
Yosemite: https://mathpirate.net/hold/3DS/Yosemite3DS.zip 27 pictures of Yosemite National Park, including Glacier Point, the Ahwahnee, Tioga Road, and the Sentinel Dome trail.
Central California: https://mathpirate.net/hold/3DS/CentralCalifornia3DS.zip 56 pictures, including Old Sacramento, Monterey, San Juan Bautista, Pinnacles National Monument, the Big Sur Coast, and Sequoia and Kings Canyon National Parks.
Zion National Park: https://mathpirate.net/hold/3DS/ZionNationalPark3DS.zip 19 pictures of Zion National Park.
April 9, 2011 8 Comments

