Finite State Machine
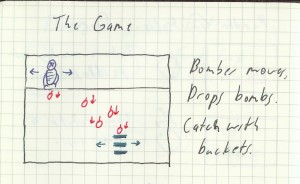
I think I’m going to have to put together a finite state machine for the robot. The robot for Pong had essentially two states: “Playing” and “Totally Flipping Out”. I need to do a better job than that for this one.
Here’s the basic states for Kaboom!:
- Bombs on screen:Â Track the lowest bomb.
- No Bombs on Screen: Press button.
- No Buckets on Screen:Â Hit Game Reset switch.
At this time, it won’t be able to hit the Game Reset switch itself, so it should probably put a notice on the screen for human intervention. ((And I don’t want to give it the ability to hit the reset switch itself. You teach it how to do that and you never know what it’s capable of.)) For the “No Bombs on Screen” state, it’s going to have to hit the button, then wait before trying to hit the button again, otherwise it’ll hit the button a second time, before the bombs start to fall, and it’ll lose precious reaction time. When the bombs are on the screen, it’s going to have to be careful and make sure that it doesn’t get fooled by blips where the lowest bomb disappears for a frame. However, it can’t be too careful, since it’s going to have to move to the next spot as soon as it catches a bomb.
For now, I’ll get the “Bombs on Screen” state going, since that’s the one that’s important. I can hit the button myself for now, as long as I’m careful to keep my fingers clear of the spinning bricks.
February 28, 2010 No Comments
Stronger Than Anticipated.
The gripper piece of the spinner assembly is a bit stronger than I’d anticipated.
That wasn’t supposed to happen…
February 28, 2010 No Comments
Guidance System Video
Here’s a video of the game processing.
[mediaplayer src=’/log/wp-content/uploads/2010/02/KaboomDirections2.wmv’ ]
I don’t think it’s quite as fascinating to watch as the laser line and target circle trajectory projections of Pong, but I am happier that the game is much cleaner to work with.
This was a recording of the game processing a previously recorded play session. It’s not a recording of the robot playing, nor is it a recording of me playing with the augmented display.
If you notice, I’m measuring distance from the edge of the bucket, not the center. I’m hoping that will help alleviate some of the overrun effect. It will have the entire bucket distance available as a buffer.
February 28, 2010 No Comments
Guidance Systems Online
The computer can now tell you where to go.
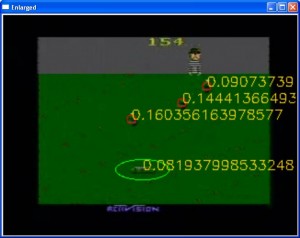
Bombs that will be caught by the buckets in their current position turn green, bombs that will be missed turn red. If the buckets will catch the lowest bomb, they turn green, otherwise they’re pink and give you a pointer as to how far you need to move and in which direction. If there are no bombs detected, the buckets turn white.
February 28, 2010 No Comments
Calculating ROI
I’ve managed to cut the processing time from 160 ms, down to 70 ms, and there’s still room for improvement. I did it by using something called an ROI, or “Region of Interest”.
Pretty much every image operation in OpenCV can be restricted to the ROI of an image. It’s a rectangular mask, specifying the region that you’re interested in. If you want to blur out a box in an image, you set the ROI on the image, call the blur function, then unset the ROI, and you’ll have a nice blurred box in your image. You can also use the ROI to tell OpenCV to only pay attention to a specific area of an image when it’s doing some kind of CPU intensive processing, which is what I did.
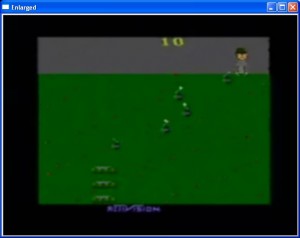
Look at the Kaboom! playfield for a moment. What do you see?
For starters, there’s that big black border around the edge. I don’t need to process any of that at all for any reason. Any cycles spent dealing with that are a complete waste of time.
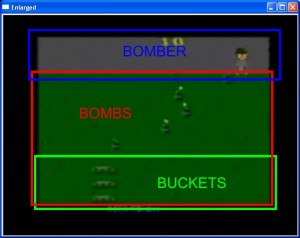
Then, each item I want to recognize lives in a particular part of the screen. The bombs are only in the green area, the buckets live in the bottom third of the green zone, and the bomber lives up in the grey skies.
So why should I look around the entire screen for the buckets, when I know that they’re going to live in a strip at the bottom of the green area? That’s where the ROI comes in.
I can tell the processor to only look within specific areas for a given object. There will be no matches outside of that zone. If a bucket ever ends up in the sky, it means my Atari is broken and I will be too sad to continue. If it thinks that one of the bombs looks like the bomber, then it’s a false hit that I don’t want to know about. By restricting the ROI on the detection, I’ve seen a significant boost in performance.
And that 70ms is what I got for using large ROIs, ones considerably larger than shown in the image above. If I limit the processing to those areas, I expect to be able to knock it down to around 40-45 ms, maybe even less.
Of course, in order to do that, I’d rather not hard code pixel dimensions. I’m going to have to find the grass and the sky automatically.
February 28, 2010 No Comments
I HAZ A BUKKIT
February 27, 2010 No Comments
Bomb Detection
I finally made some headway into detecting the bombs.
It missed one, though…
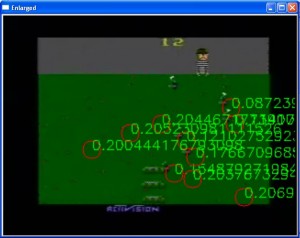
As I noted, you call cvMatchTemplate to find likely matches within a larger image, then you call cvMinMaxLoc to get the location of the best match. But only the best match. What about the other matches? How do you find them?
Well, the method I used to get the points above is a fairly simple, but fairly dumb way of doing it. You get the first point from cvMinMaxLoc, then you blot it out with a filled circle and repeat. Your initial point, and points around it are now no longer considered matches, so you get the second best match, and so on. Trouble is, it’s a bit slow. You’re constantly rescanning the entire image for the best match. My friend Susan had a suggestion, where you scan strips of the image instead. Because you know that there can only be one bomb for any given row, you can partition the screen into strips roughly the height of a bomb and know that there’s only one point in each strip that you’ll care about. I’m going to try that one out and see how it does.
By the way, there are so many false circles in the image above because I’m not throwing away matches below a certain threshold. Obviously, I’ll have to do that if I want anything useful. It looks like .2 might be a good cutoff.
February 27, 2010 No Comments
Well, that’s, uh, different…
I think the blacker points are the closer matches to the image. I told it to find the bombs, and it looks like it managed to find them all. I think.
Either that or my Atari is possessed.
February 27, 2010 No Comments
The Game Part 1: Visualization
That’s the game. Those are the elements I need to recognize and react to. I’m going to need to find the bombs, find the buckets, and find the bomber.
I could try to do this in pretty much the same way that I did for Pong, but that was a bit hacky and prone to failure. I’d like to learn a bit more about some of the object detection and recognition features in OpenCV, and see if there’s some way for it to identify the components directly, instead of just assuming that different boxes are different parts of the playing field. I played with some of that on the Wesley Crusher thing, but that was using ready-made classifiers. This time I’ll have to do it from scratch and see what happens.
At any rate, the game playing logic should be easier this time around. I don’t have to deal with bouncing balls and linear regression and all of that. The bomb tracking should be failry straightforward.
Anyway, time to break out the OpenCV.
February 27, 2010 No Comments
USB Adaptor
Now, where is my Atari USB adaptor? I think it might support the paddle as an analog joystick axis. If it does, then I can tweak control outside of the problematic Pong situation. I’ll have direct feedback about where the paddle is and what it does when I move it.
Of course, I’ll have to learn how to read the value of an analog joystick access…Â But at least it’ll be doing something useful.
February 26, 2010 No Comments


